Step-By-Step:
Setup Python App
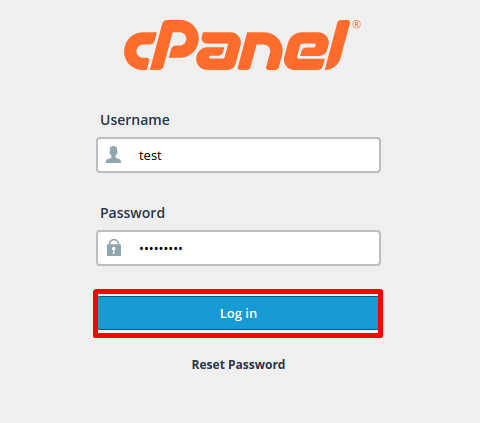
- Login to Cpanel and in Software/Services area choose Setup Python App.
 2. Setup new application form will appear. Choose Python version for your application, application folder name (App Directory) and App URI for accessing your application. Click Setup to create an application.
NOTE: We recommend that you save your applications inside an inner folder. For example ‘python\apps’ could be a good name for it, so your application directory would be “/home/username/python\_apps/app” (type just python\_apps/app in the ‘App Directory’ field) and the virtual environment for that app into the “/home/username/virtualenv” folder would looks like: “python\\_apps\_app”.
2. Setup new application form will appear. Choose Python version for your application, application folder name (App Directory) and App URI for accessing your application. Click Setup to create an application.
NOTE: We recommend that you save your applications inside an inner folder. For example ‘python\apps’ could be a good name for it, so your application directory would be “/home/username/python\_apps/app” (type just python\_apps/app in the ‘App Directory’ field) and the virtual environment for that app into the “/home/username/virtualenv” folder would looks like: “python\\_apps\_app”.

- After a little while a new application entry will be appended to the web-page. Inside “/home/username/public\_html” folder a new .htaccess will be created, which has directives that point to your app directory
- You can edit the URI for the application, wsgi handler. If you click Edit - the value is converted to input field and thus becomes editable. When editing is complete, click Save.
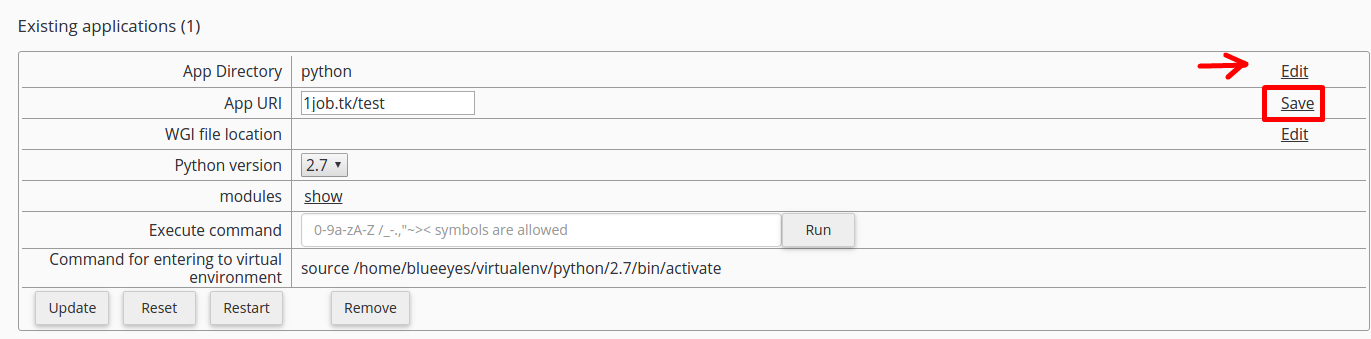
- Wsgi entry is to specify python wsgi application entry point. Once you have created your app, the app directory ‘/home/username/python\_apps/app’ will contain the following structure:
--- public/
--- tmp/
--- restart.txt (empty file)
--- passenger\_wsgi.py In the WGI file location field, specify an absolute path to that file adding ‘:app’ at the end, for example: ‘/home/username/python\_apps/app/passenger\_wsgi.py:app’ (it shouldn’t be necessary to change this field, as it is taken by default by the app). 5. When Show control is clicked, python extensions section will be expanded. It gives the ability to Add or Remove python modules.
- When start typing in input field, appropriate hints are shown in drop-down list.
- Choose the entry you want from drop-down and click Add.
- If you click Delete, the corresponding module entry will disappear.
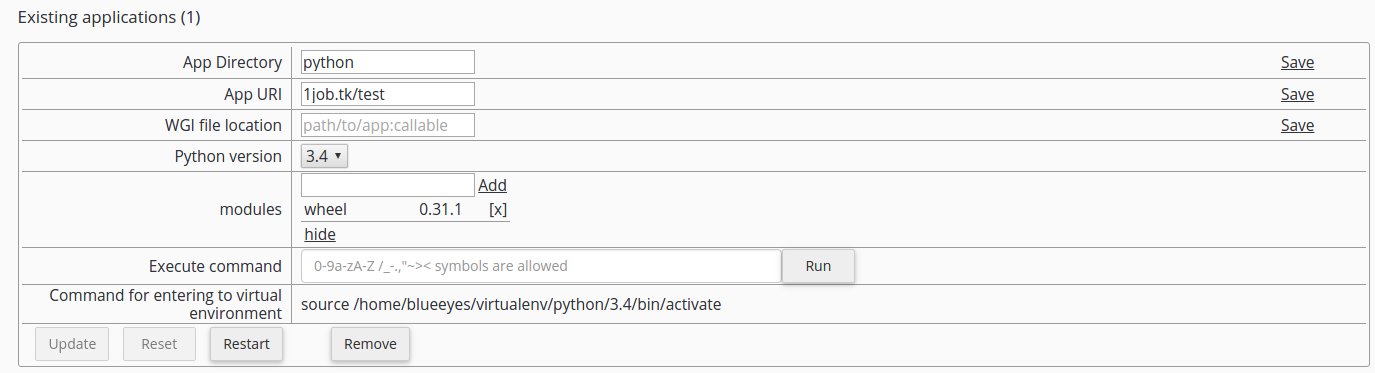 PS. In addition to setting uri and wsgi, the Python version can be changed as well by changing the value in select drop-down.
- No changes are applied to application environment until Update button is clicked. Before the Update button is clicked, all changes can be reverted with Reset button.

- Click Remove to delete the application - the application folder itself will remain unmoved.
Setup Django
Let’s say your app directory is ‘pytho\_apps/app’. Optional: if you’d like to see errors that are not managed by Django application add the following line into your .htaccess (you can find it inside the /home/username/public\_html folder):PassengerFriendlyErrorPages on
- Type Django in Modules empty box
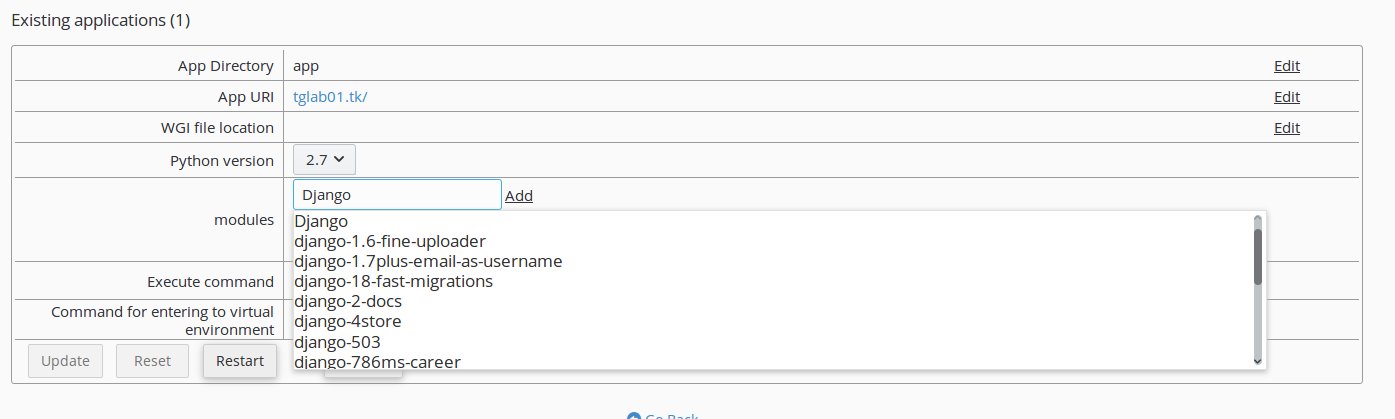
- Choose Django version.
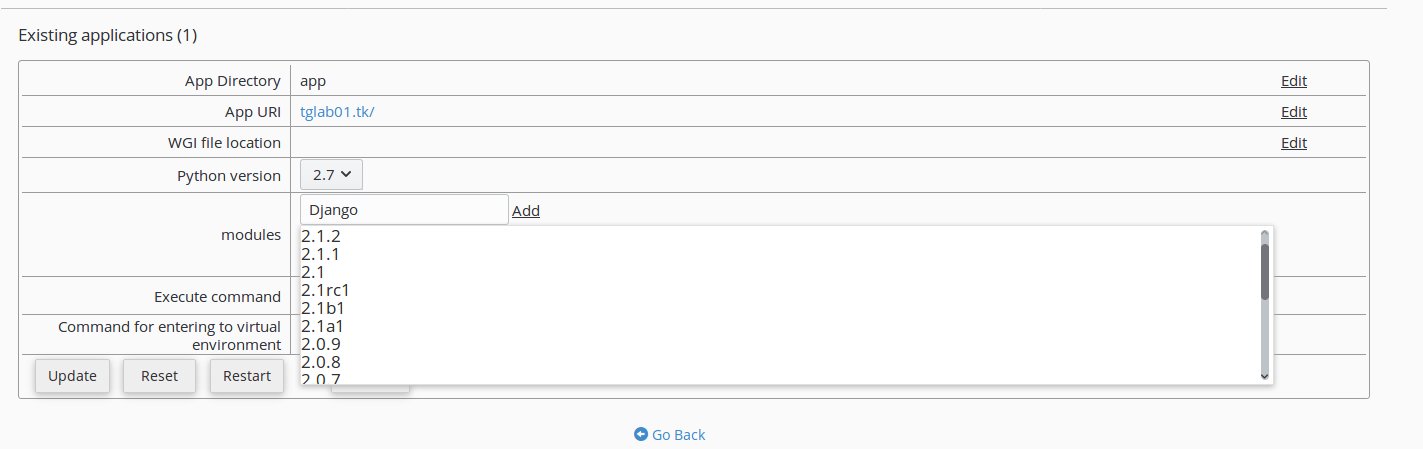
- Execute the command next to “Command for entering to virtual environment” to activate the virtual environment. For example source /home/username/virtualenv/app/2.7/bin/activate and click Run.
--- public/
--- tmp/
--- restart.txt
--- passenger\_wsgi.py
--- manage.py
--- app/
---\ \init\\_.py
--- settings.py
--- urls.py
--- wsgi.py
- Remove file passenger\_wsgi.py from your app directory. Copy wsgi.py from ‘your\_app\_directory/app’ (if you have followed the initial recommendations it would be /home/username/python\_apps/app/app’), rename it to ‘passenger\_wsgi.py’ and paste it outside this folder, which means in the app directory where the original ‘passenger\_wsgi.py’ file was removed.
 On the other hand, If you had not set ‘WGI file location’ yet, once you set it (with absolute path as it was explained above ‘/home/username/python\_app/app/passenger\_wsgi.py:app’), the content of the file will be changed, resulting in a 500 error page. So, all you need to do is repeat step 6.
PS: In order for your Static Content to be processed you need to upload the files in the /static folder under your application directory. The STATIC\_ROOT variable in settings.py defines the single folder you want to collect all your static files into.
On the other hand, If you had not set ‘WGI file location’ yet, once you set it (with absolute path as it was explained above ‘/home/username/python\_app/app/passenger\_wsgi.py:app’), the content of the file will be changed, resulting in a 500 error page. So, all you need to do is repeat step 6.
PS: In order for your Static Content to be processed you need to upload the files in the /static folder under your application directory. The STATIC\_ROOT variable in settings.py defines the single folder you want to collect all your static files into.