
- Introduction
- Supported web servers
- Download NopCommerce
- Upload NopCommerce
- Extract NopCommerce zip
- Disable 32bit applications for the web site
- Create MS SQL user and database
- Install NopCommerce
Introduction
nopCommerce is the most popular ASP.NET shopping cart in the world based on Microsoft technologies. Free and open-source eCommerce platformSupported web servers
For nopCommerce 4.50: Install .NET 6 runtime (Tested on our Windows Plesk 2019 servers)For nopCommerce 4.40: Install .NET 5 runtime
For nopCommerce 4.30: Install .NET Core 3.1 runtime
For nopCommerce 4.20: Install .NET Core 2.2 runtime
For nopCommerce 4.10: Install .NET Core 2.1 runtime
For nopCommerce 4.00: Install .NET Core Window Server hosting runtime
For nopCommerce 3.90 or below: ASP.NET 4.5 (MVC 5.0) and Microsoft .NET Framework 4.5.1 or above
Download NopCommerce
In order to download a NopCommerce, you will need to create account with them.- Go to
- Download NopCommerce for Windows on your local computer

Upload NopCommerce
- Login to Plesk panel
- Go to Files
- Open htdocs
- Click on “Plus” icon
- Upload file and select nopcommerce zip

Extract NopCommerce zip
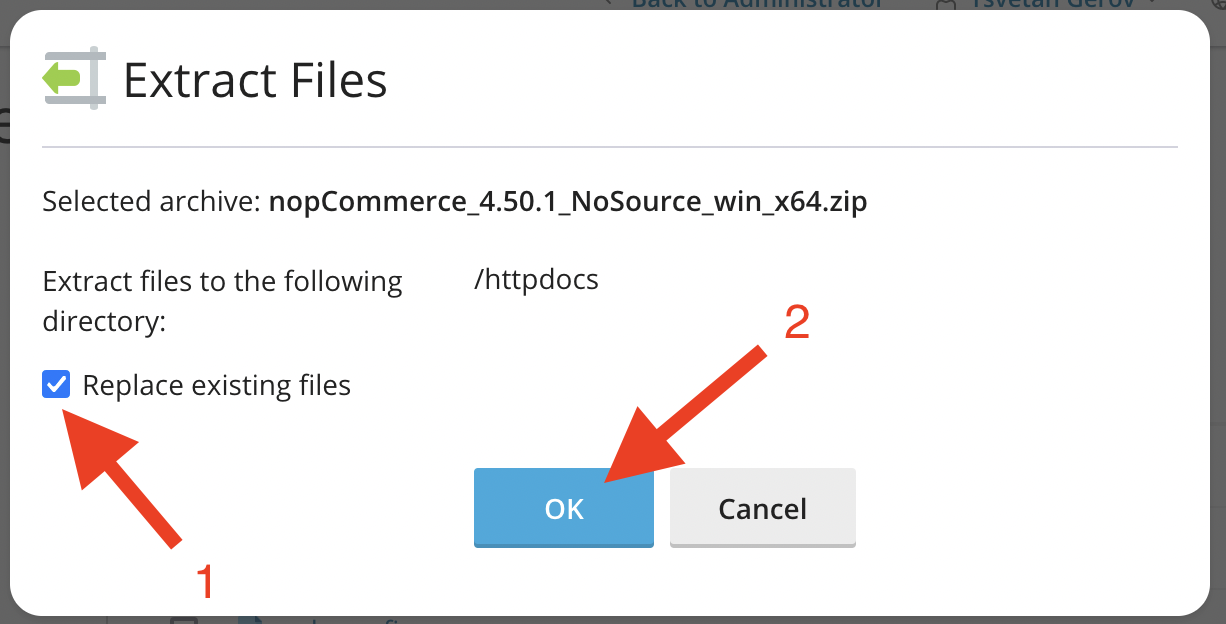
- Once the zip is uploaded click on it and extract dialog will be displayed
- Check “Repalce existing files” and then “OK”
Disable 32bit applications for the web site
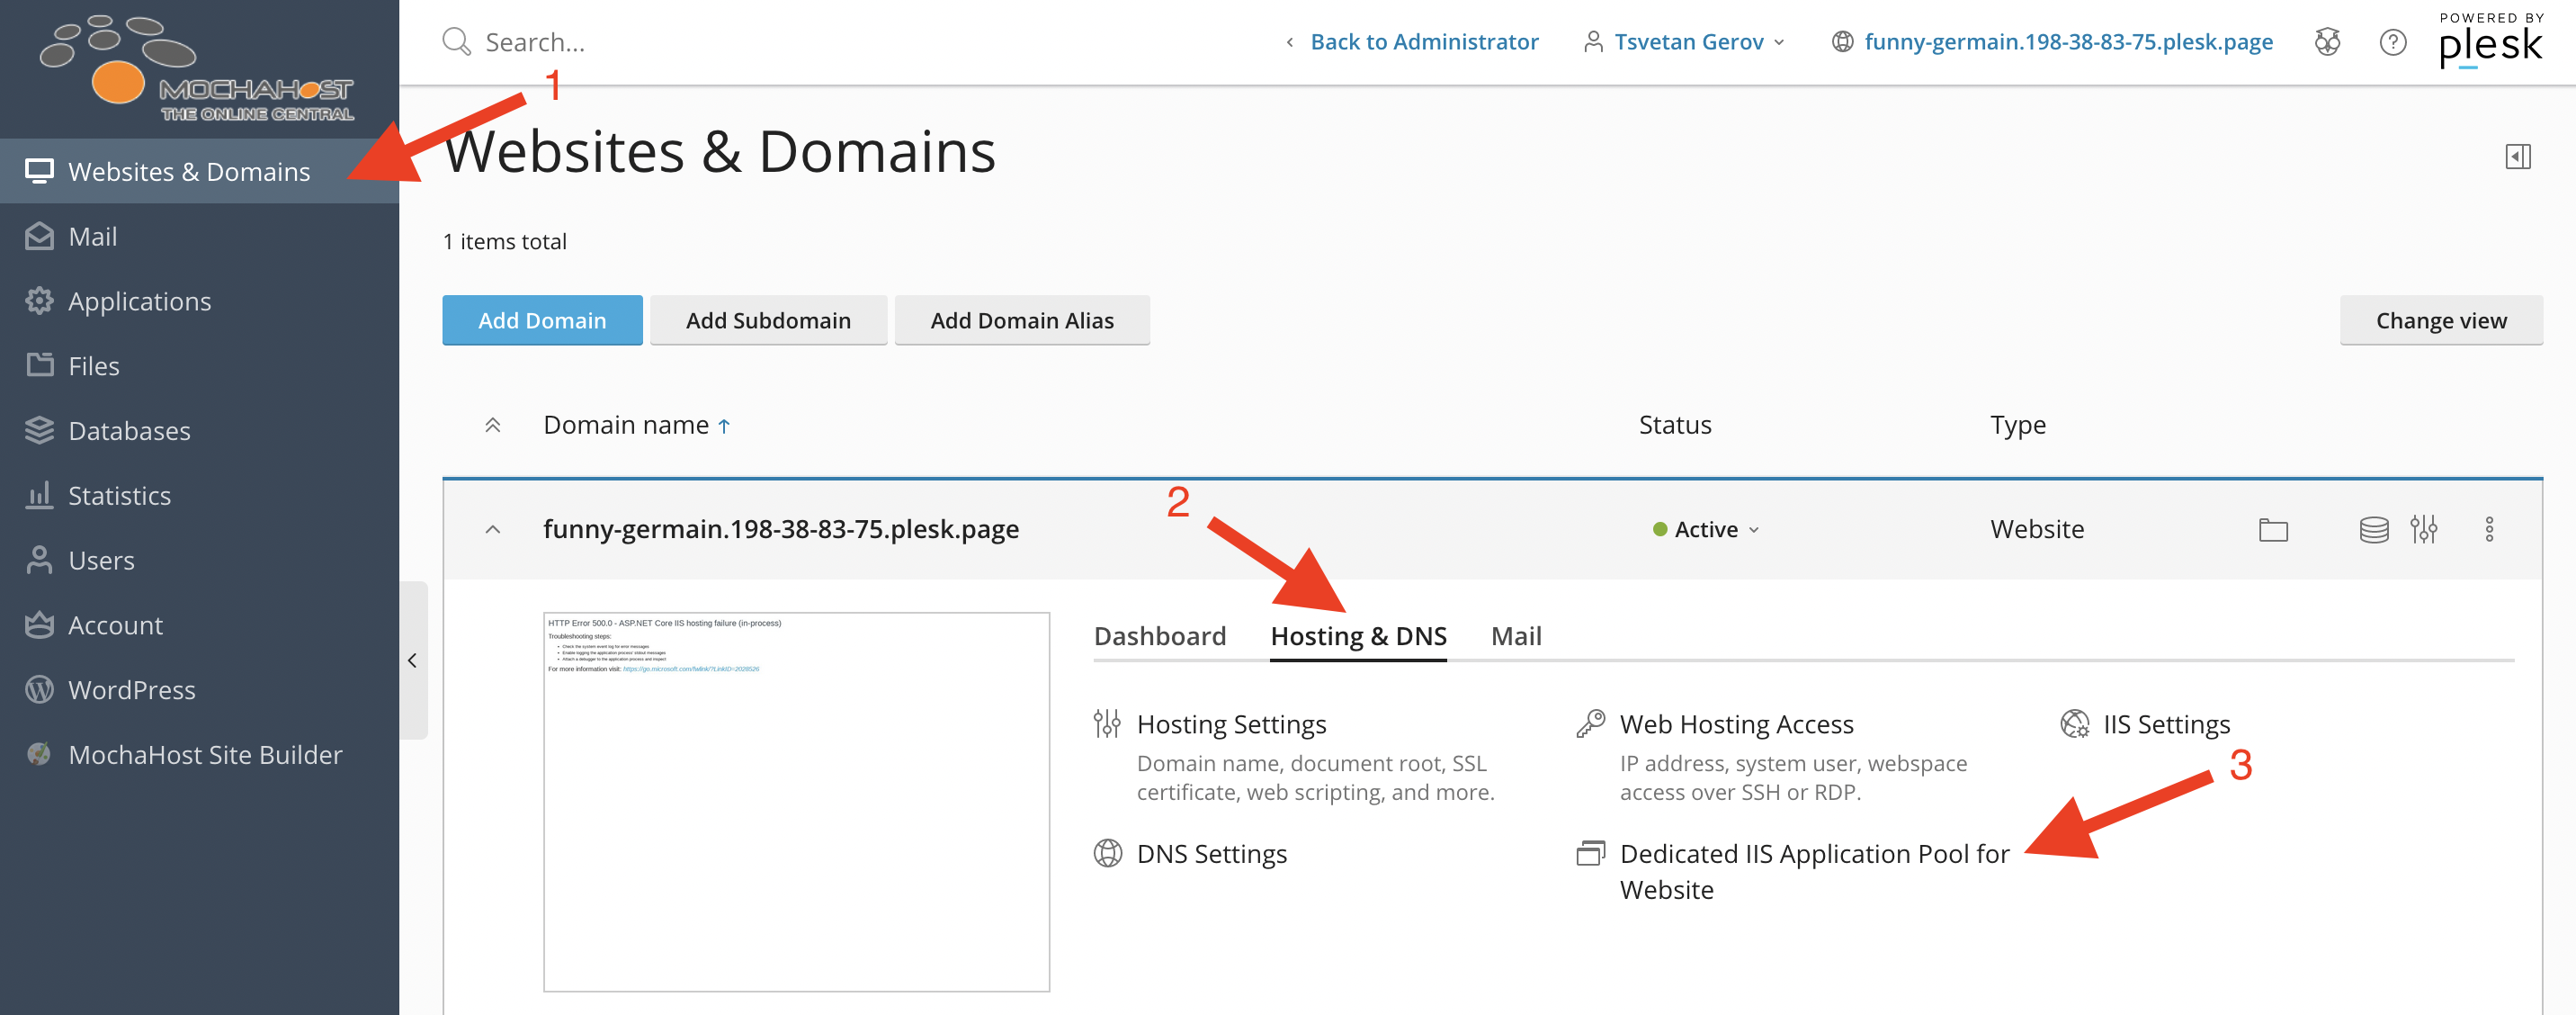
Note: If this option is not available for your hosting account, please contact our support- Go to Web Sites & Domains
- Then Hosting & DNS
- Click on Dedicated IIS Application pool for Website
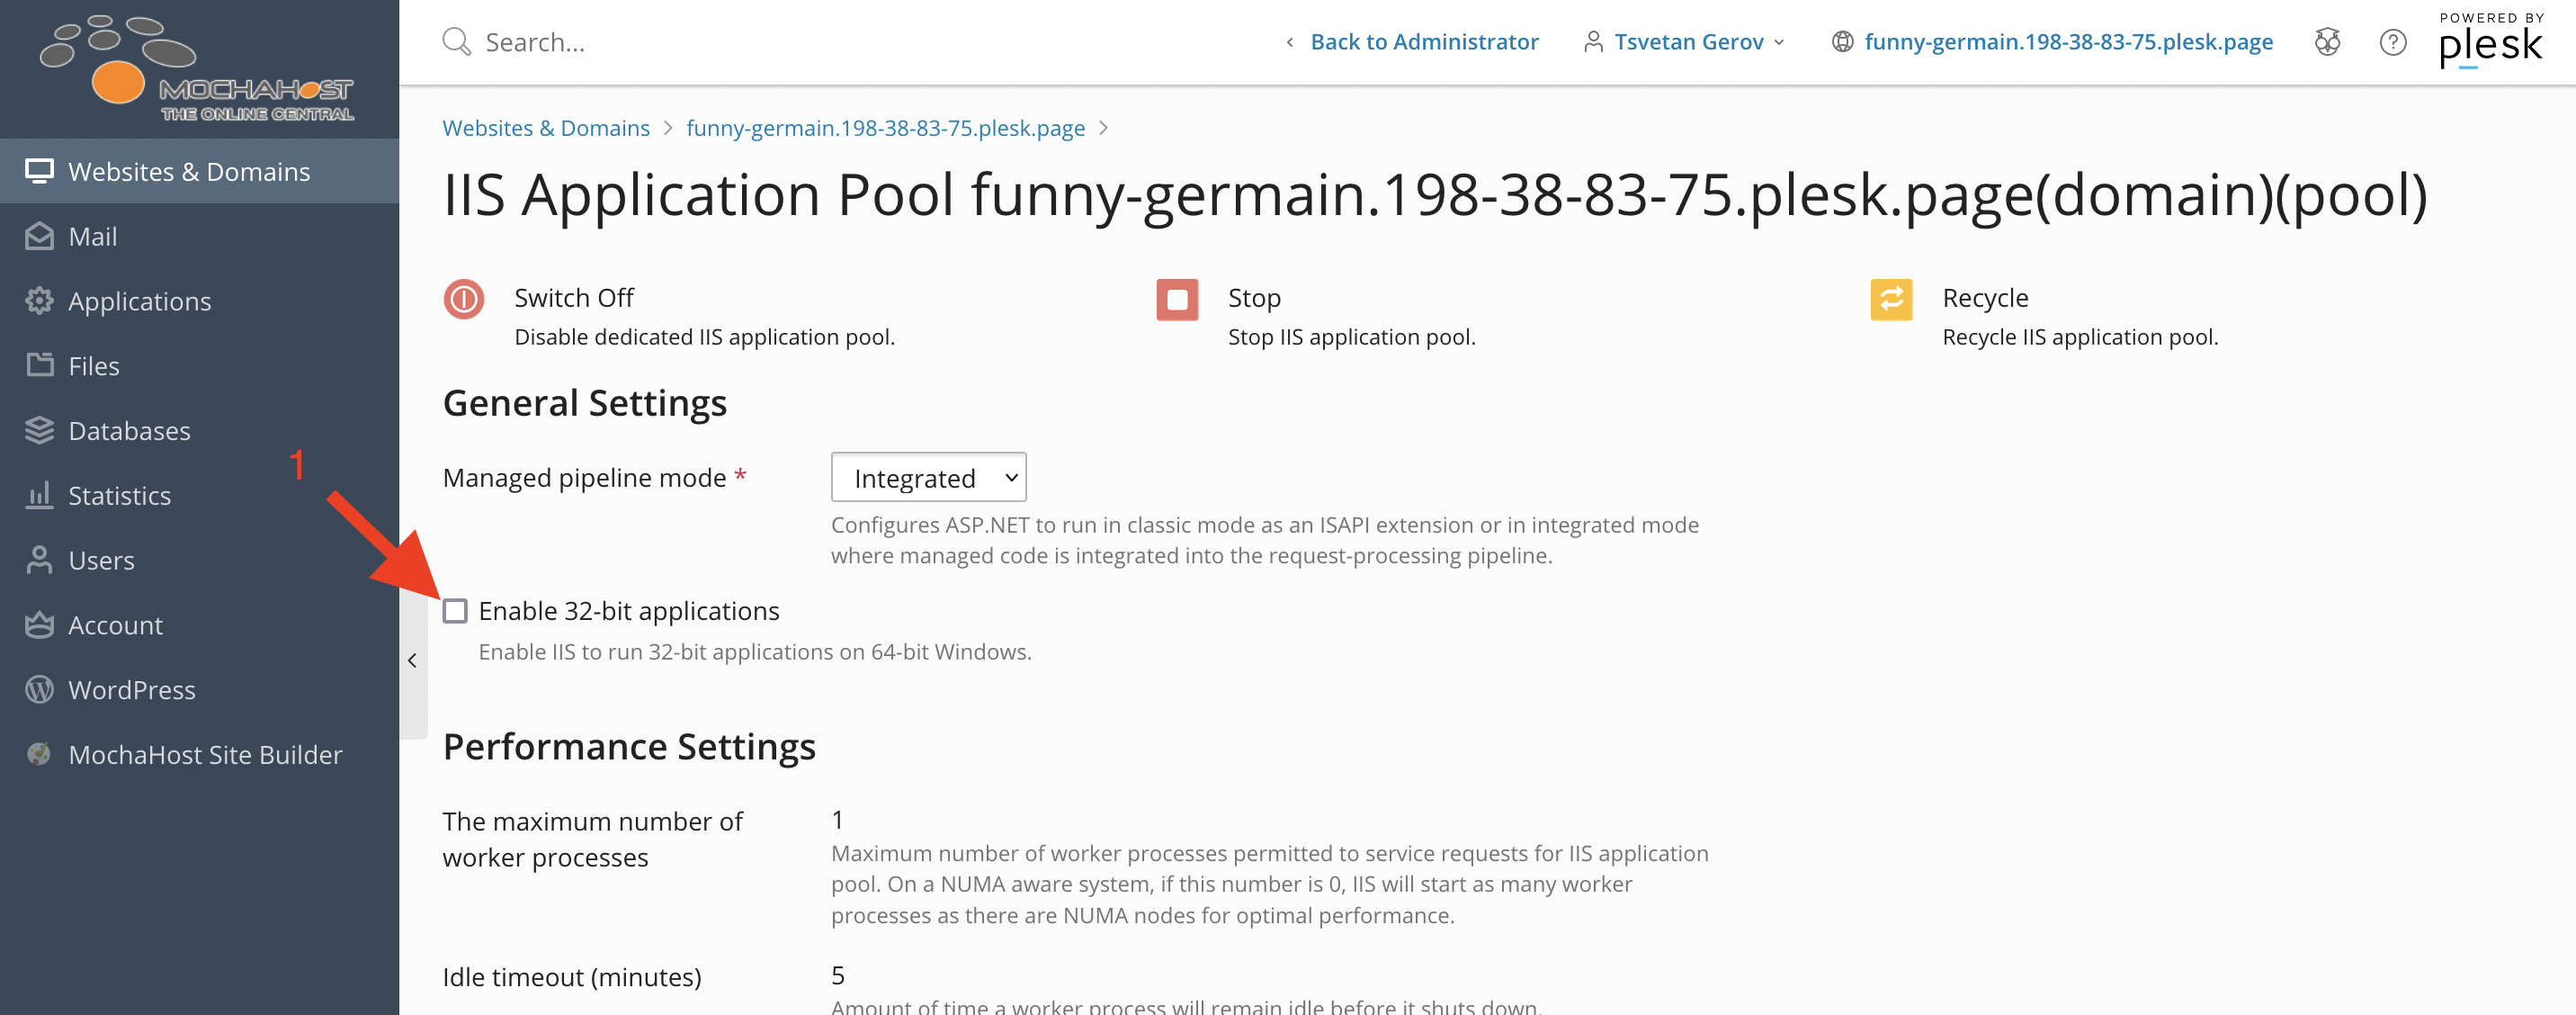
- Uncheck “Enable 32-bit applications”
- Click OK
Create MS SQL user and database
NopCommerce support the following database servers:- MS SQL
- MySQL
- PostgreSQL
- Go to Databases
- Then click on “Add database”
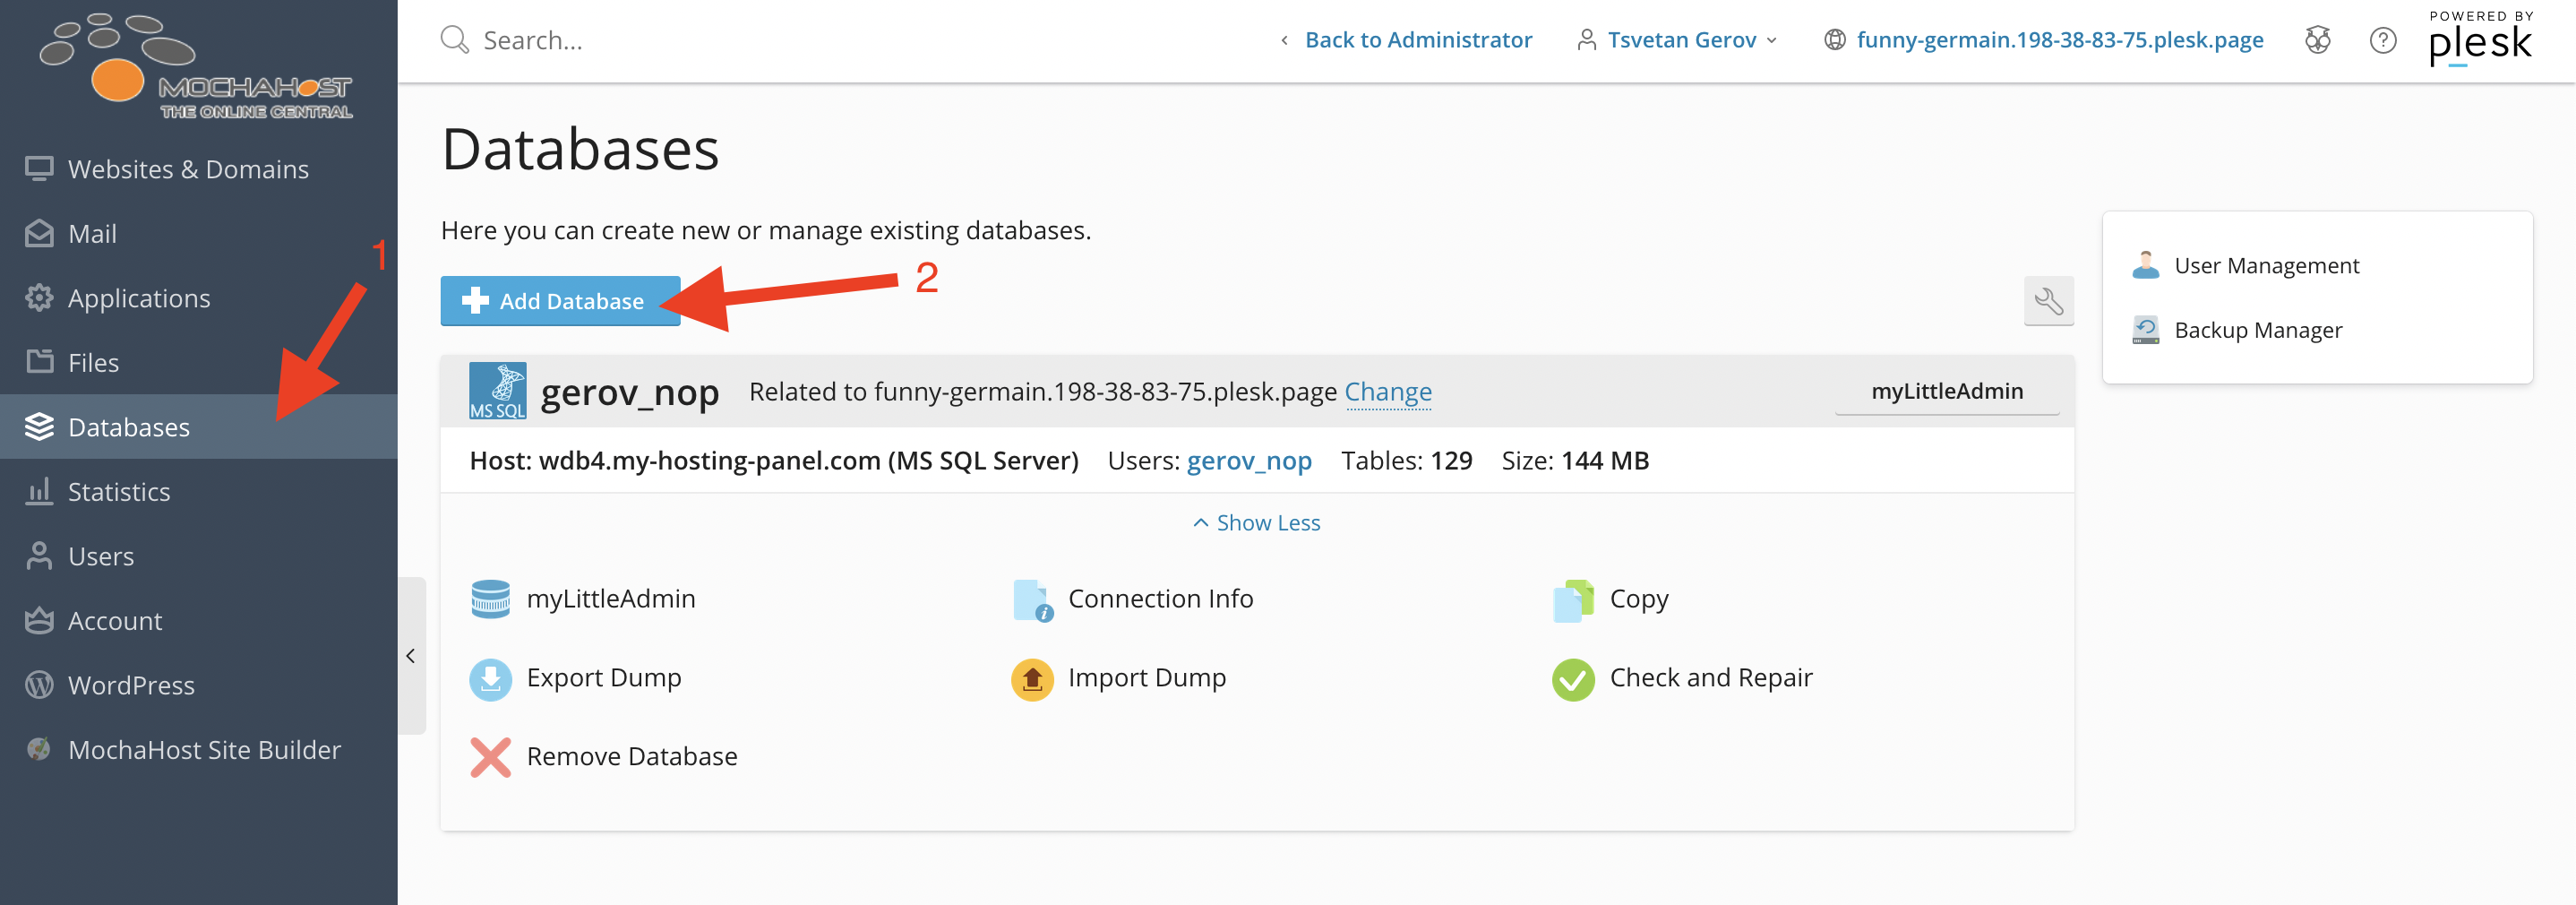
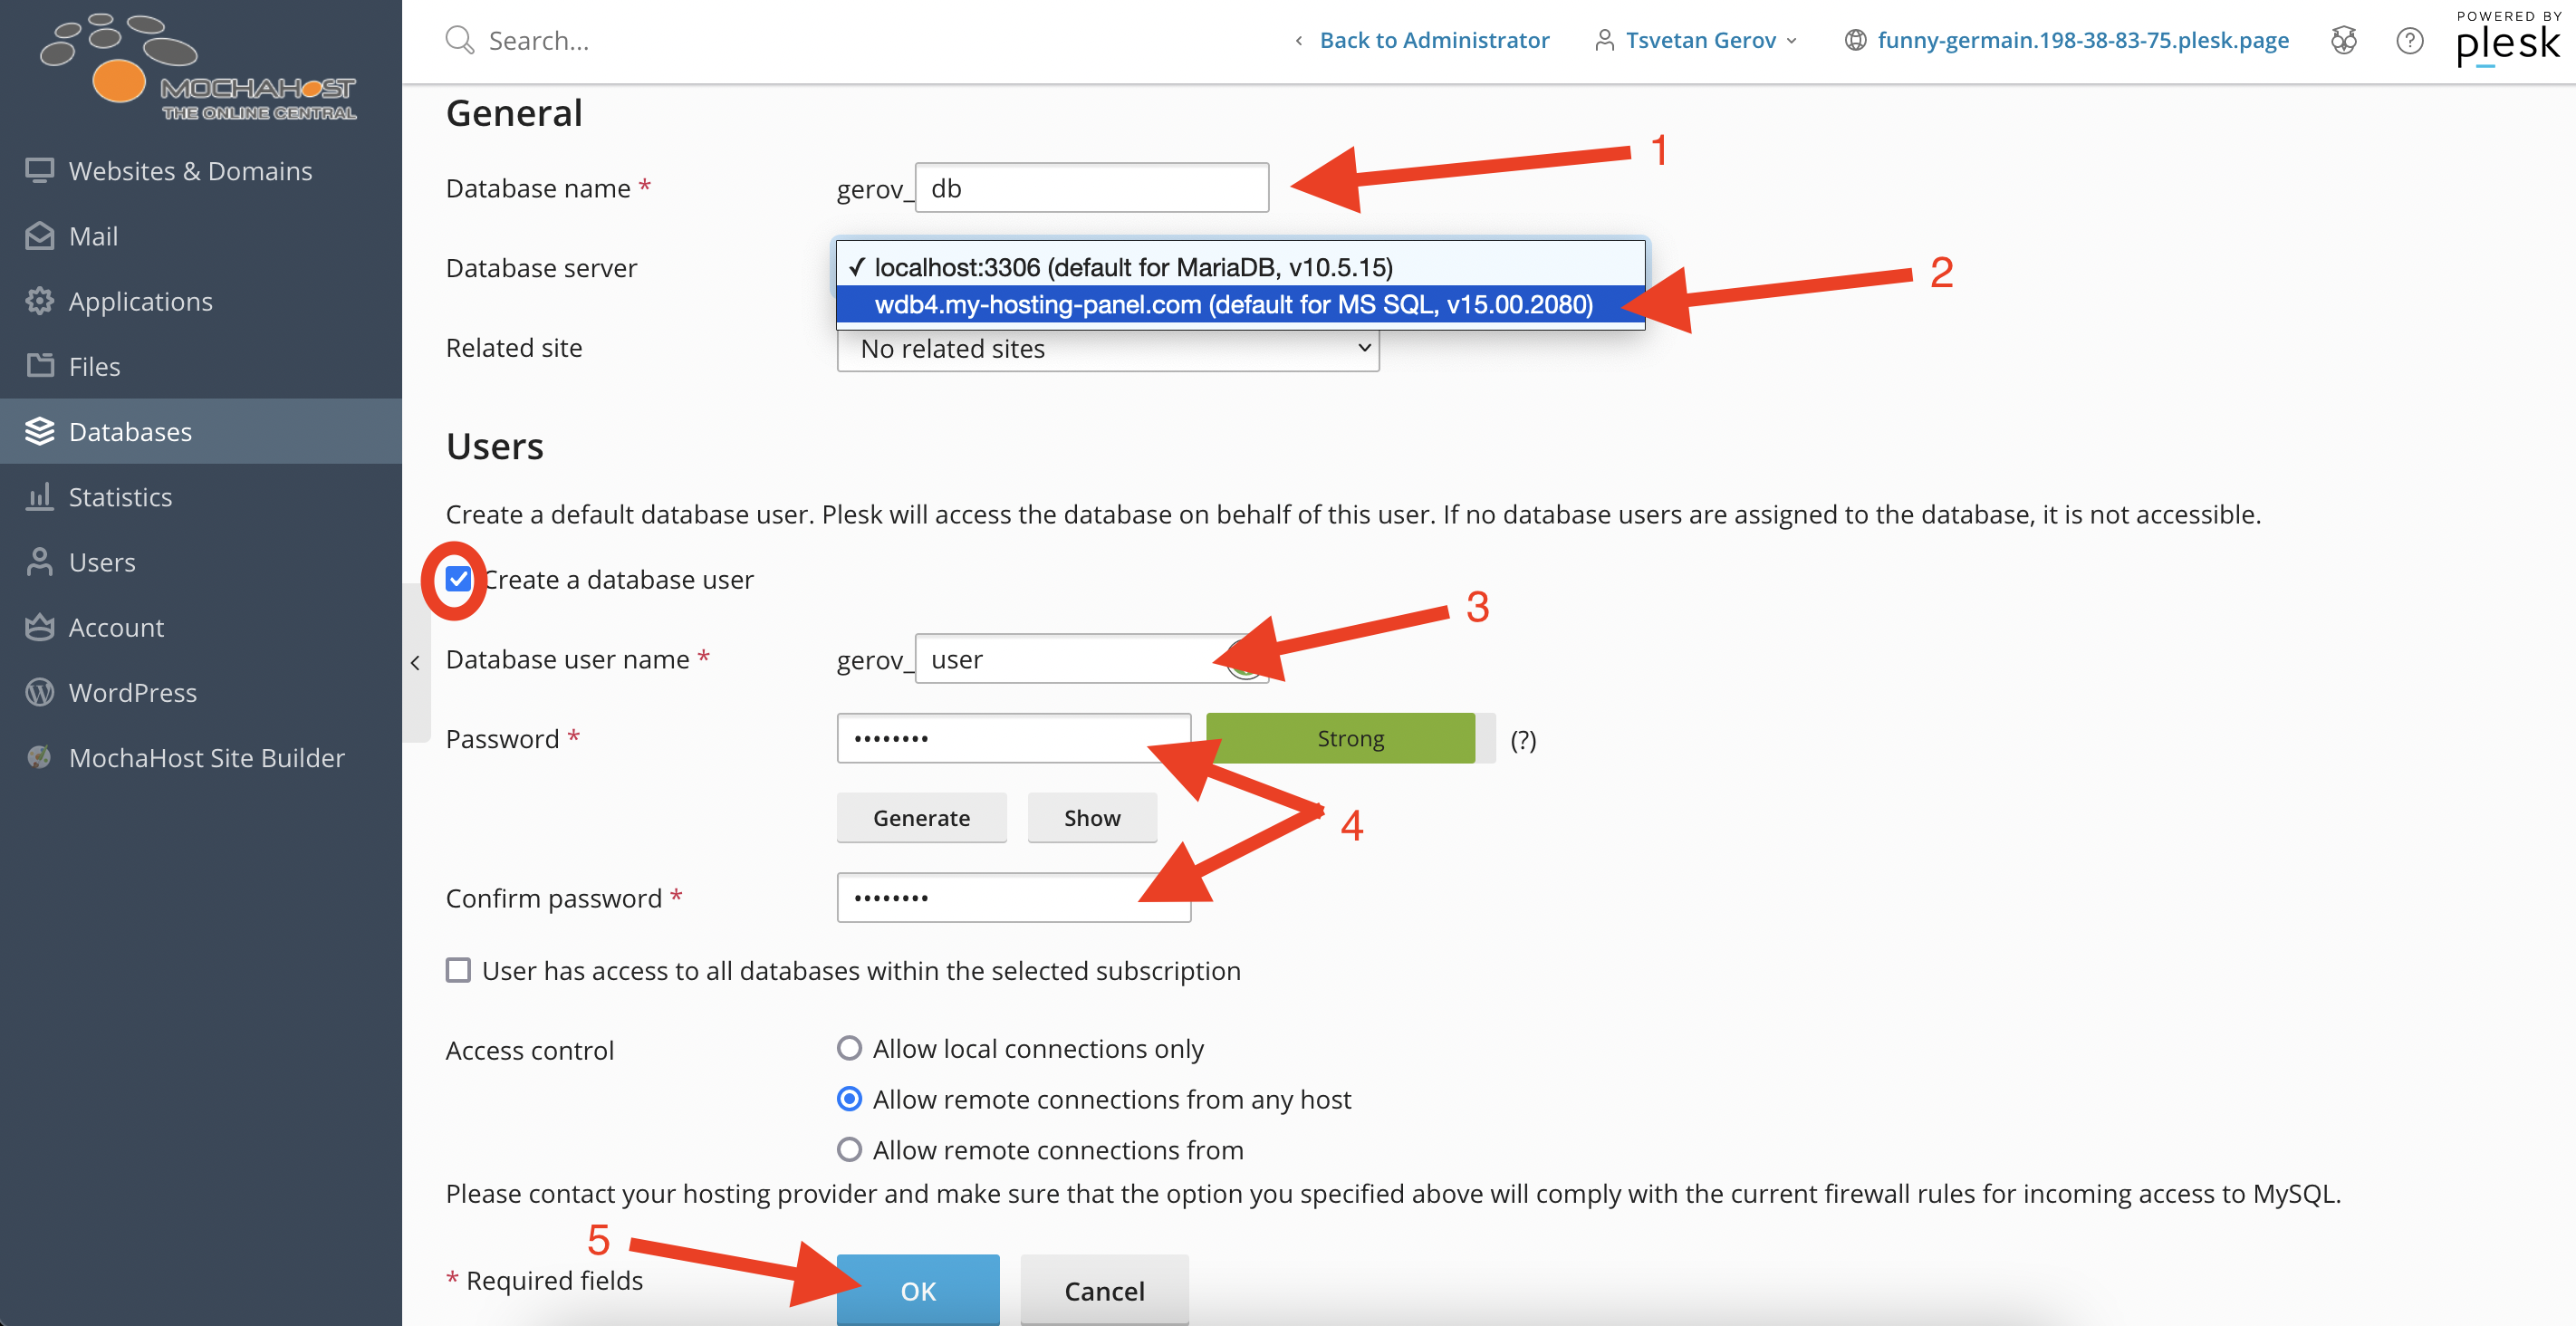
- Select MS SQL Server from database drop down menu
- Type username, database name, password
- Click OK
Install NopCommerce
- Open your domain via HTTP or HTTPS (https://yourdomain.com)
- File store information

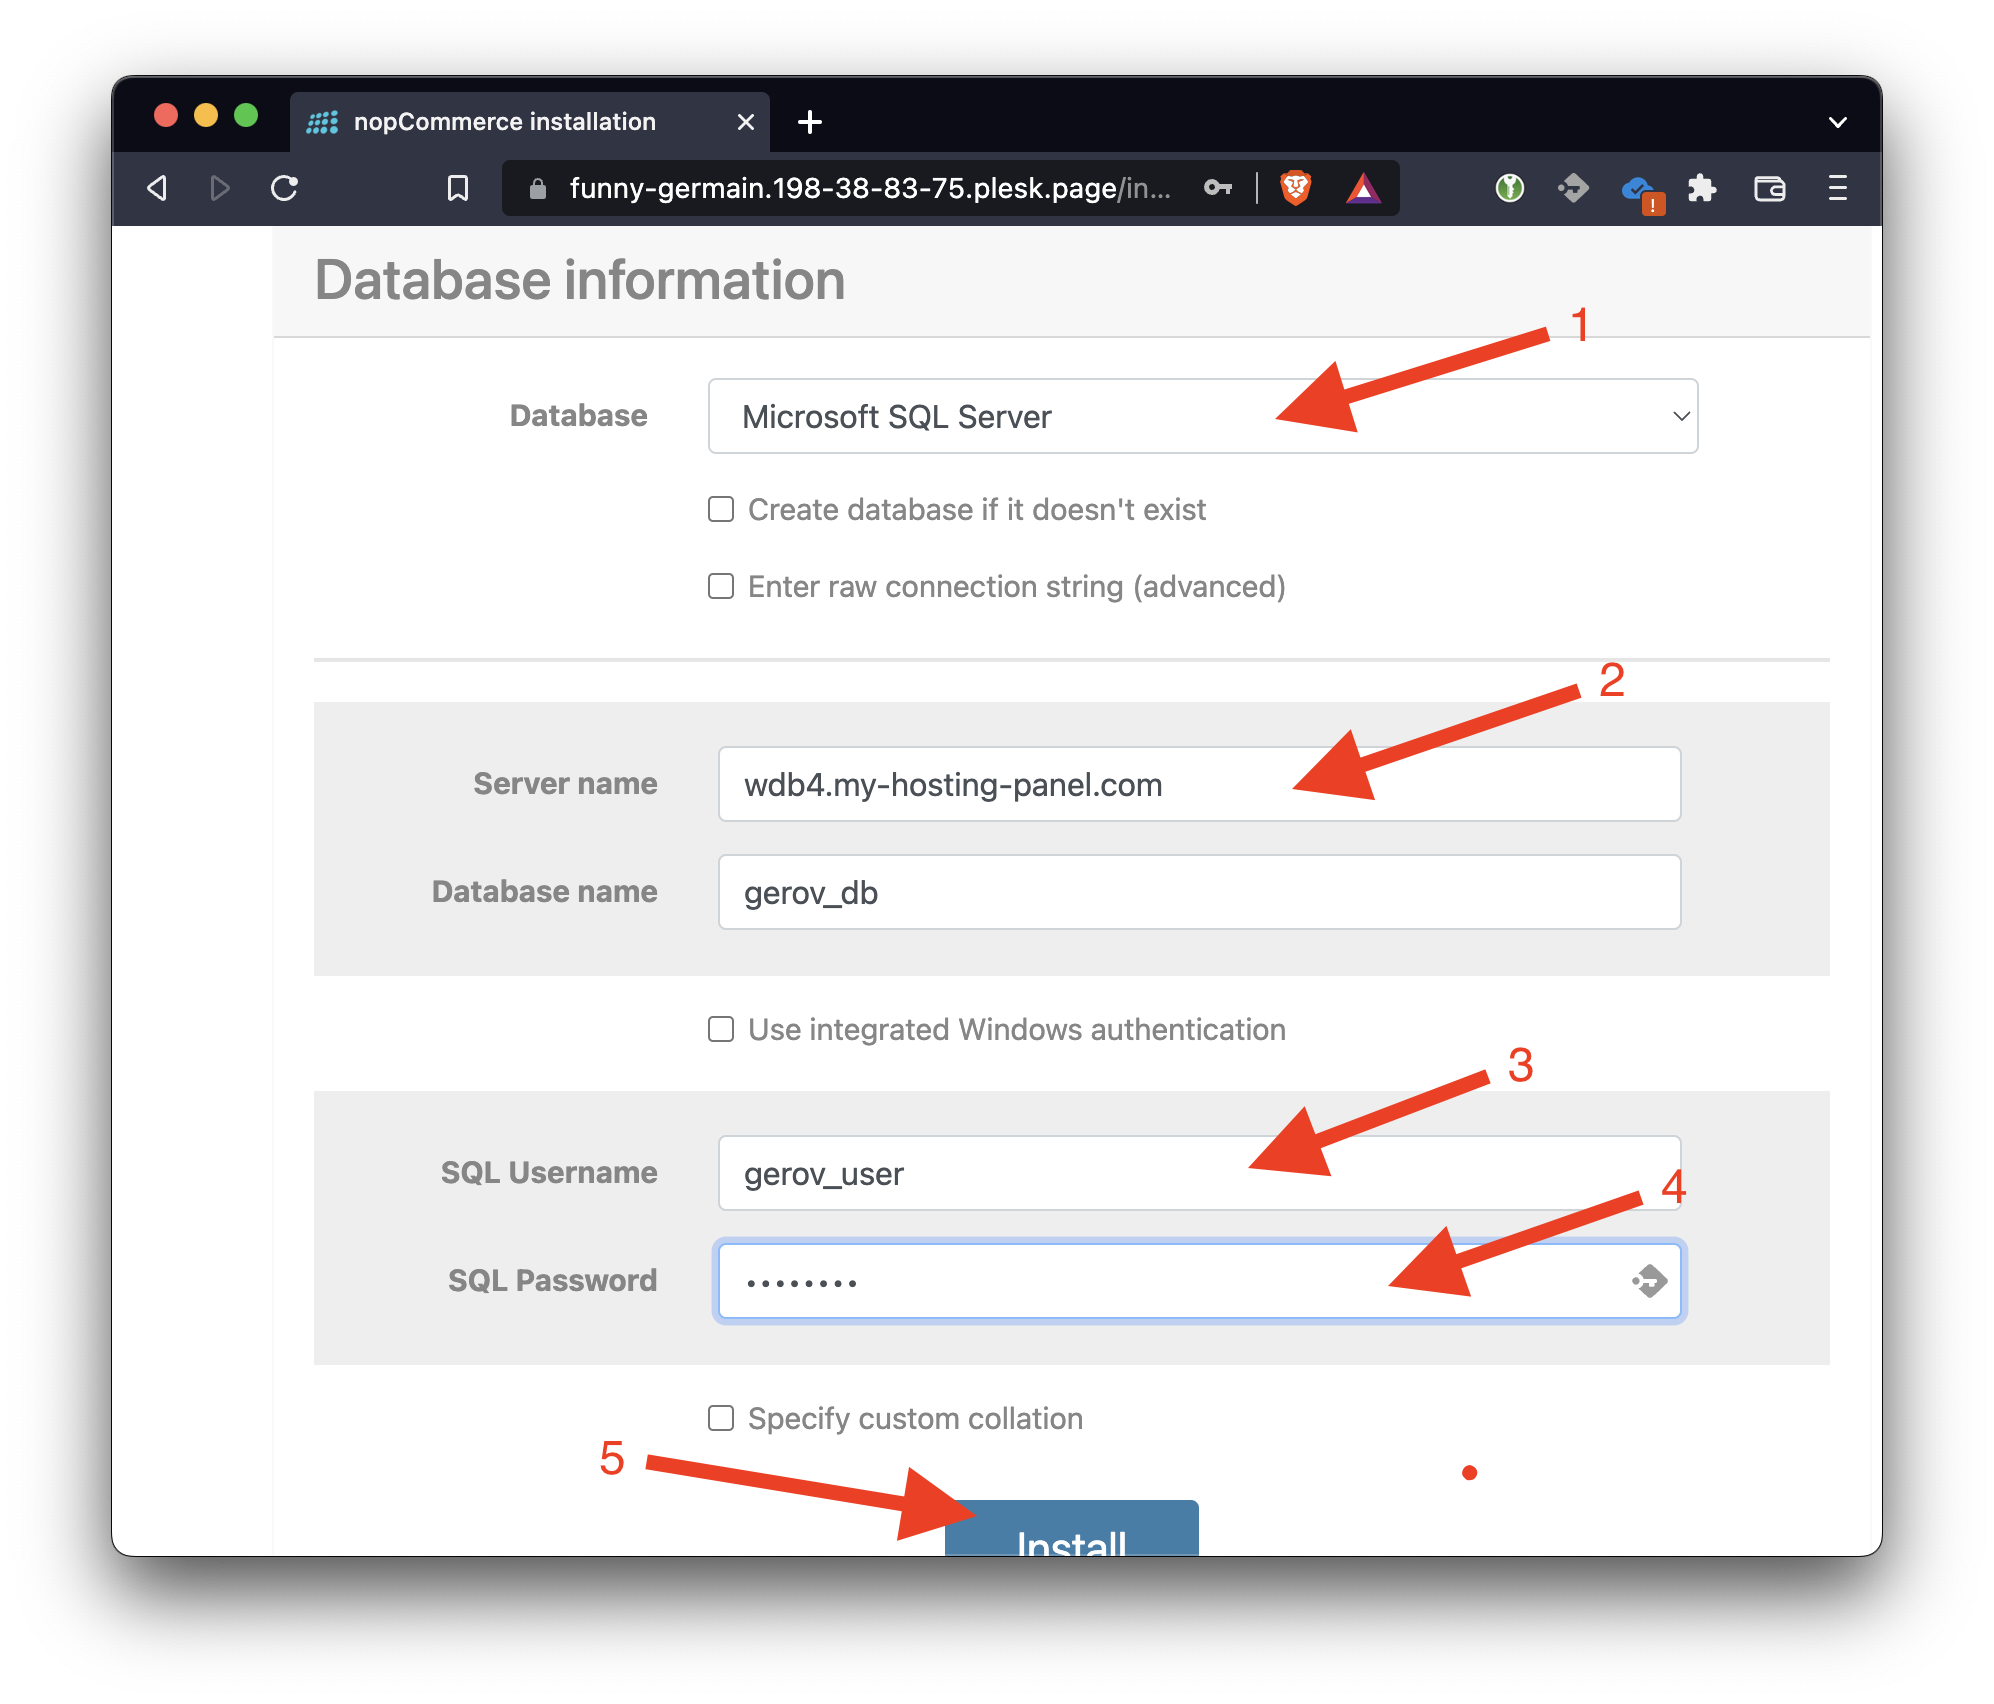
- Scroll down and fill database information
- Select MS SQL Server
- For server name, type the database server host from the Plesk panel
- Use database user, name and password that we created in previous steps
- Click Install