Jetbackup
This article applies for ALL Shared linux servers with cPanel. Although Jetbackup 4 and Jetbackup 5 are very similar, there are a couple of minor differences for the end-user. Bellow are explained all steps to restore each component for both - Jetbackup 4 and Jetbackup 5 NOTE: If the icon in cPanel says Jetbackup only - that’s Jetbackup 4.- How to restore a database
- How to restore file backups
- How to restore email backups
- How to perform a full account restoration
How to restore a database
Jetbackup 5
- Login to your cPanel account
- Scroll down, or use the search bar and type “Jetbackup 5” -> click on it
- Click on Databases

- Click on the desired backup (you will also have an option to choose from all available dates)
- In the Backup summary page, select the object and click on Restore selected items

Jetbackup 4
- Login to your cPanel account
- Scroll down, or use the search bar and type “Jetbackup” -> click on it
- Click on Databases
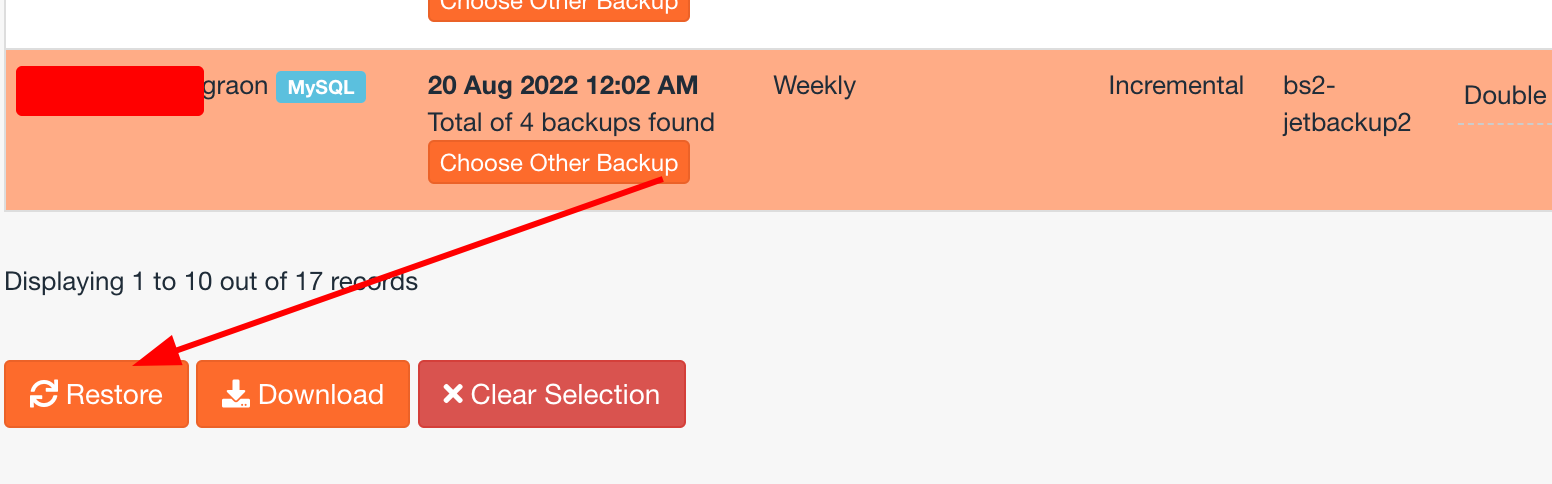
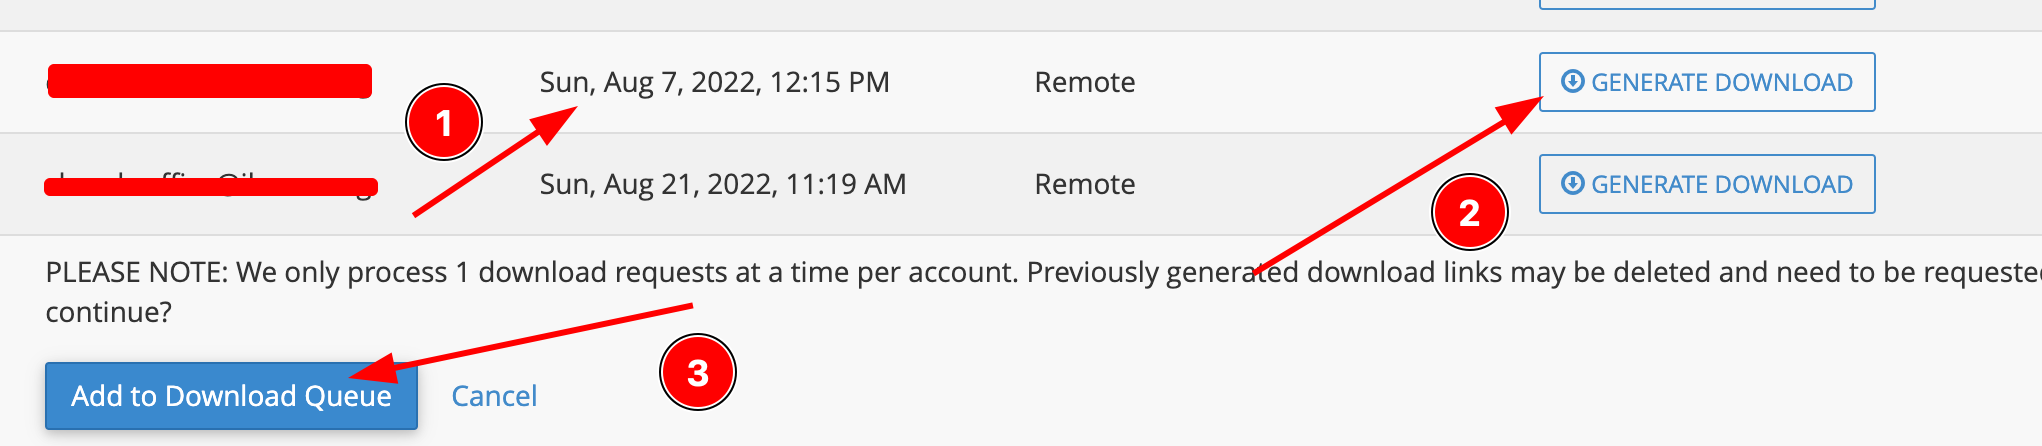
- You will be presented with all available restore points. There are two options - Download the backup or Restore

How to restore file backups
Jetbackup 5
- Login to your cPanel account
- Scroll down, or use the search bar and type Jetbackup 5 -> click on it
- Click on the Home directory tab
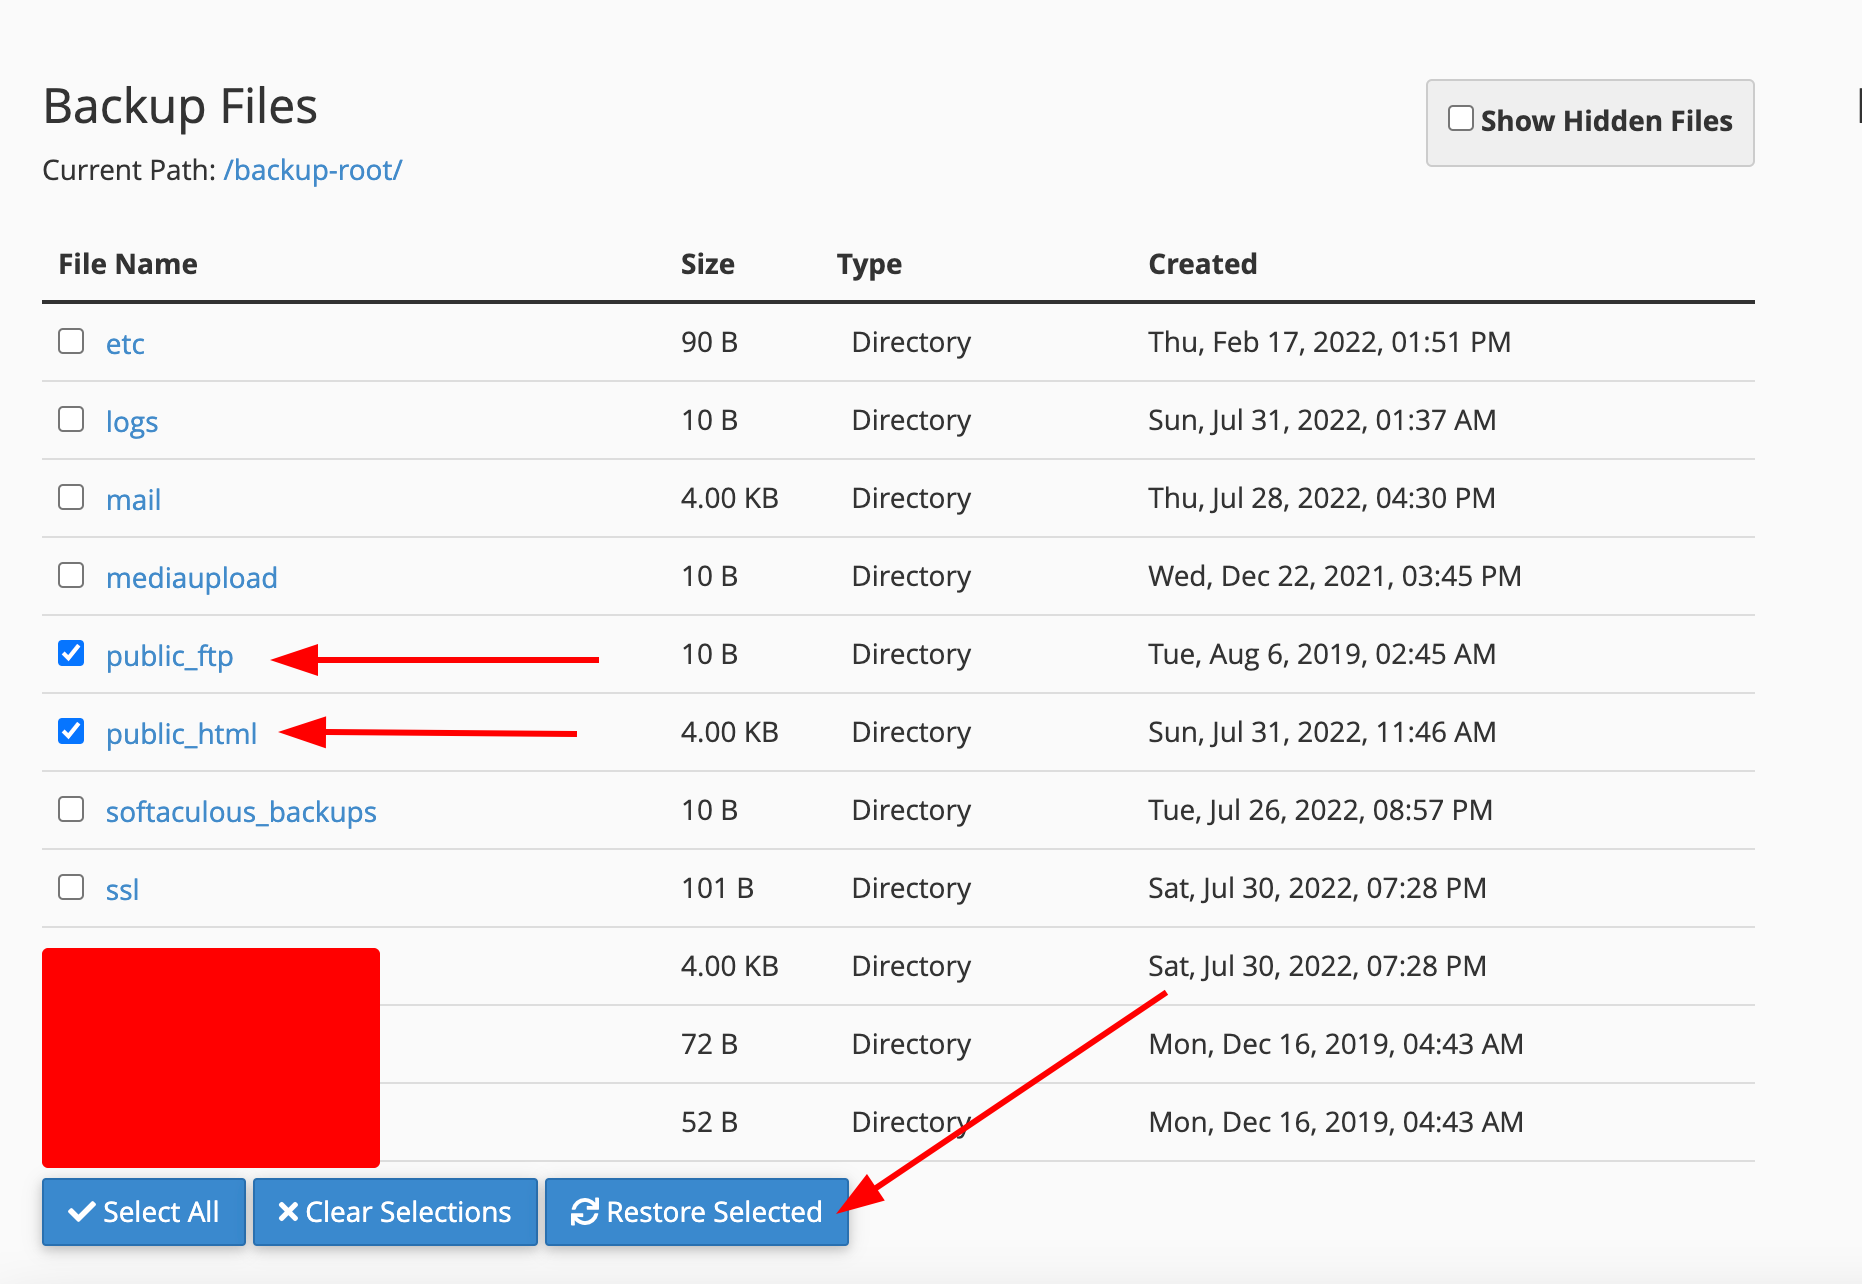
- You will be presented with all restore points for your files. By default your entire home directory is selected, but you can choose which directory/s to restore.
Jetbackup 4
- Login to your cPanel account
- Scroll down, or use the search bar and type Jetbackup -> click on it
- Click on File backups
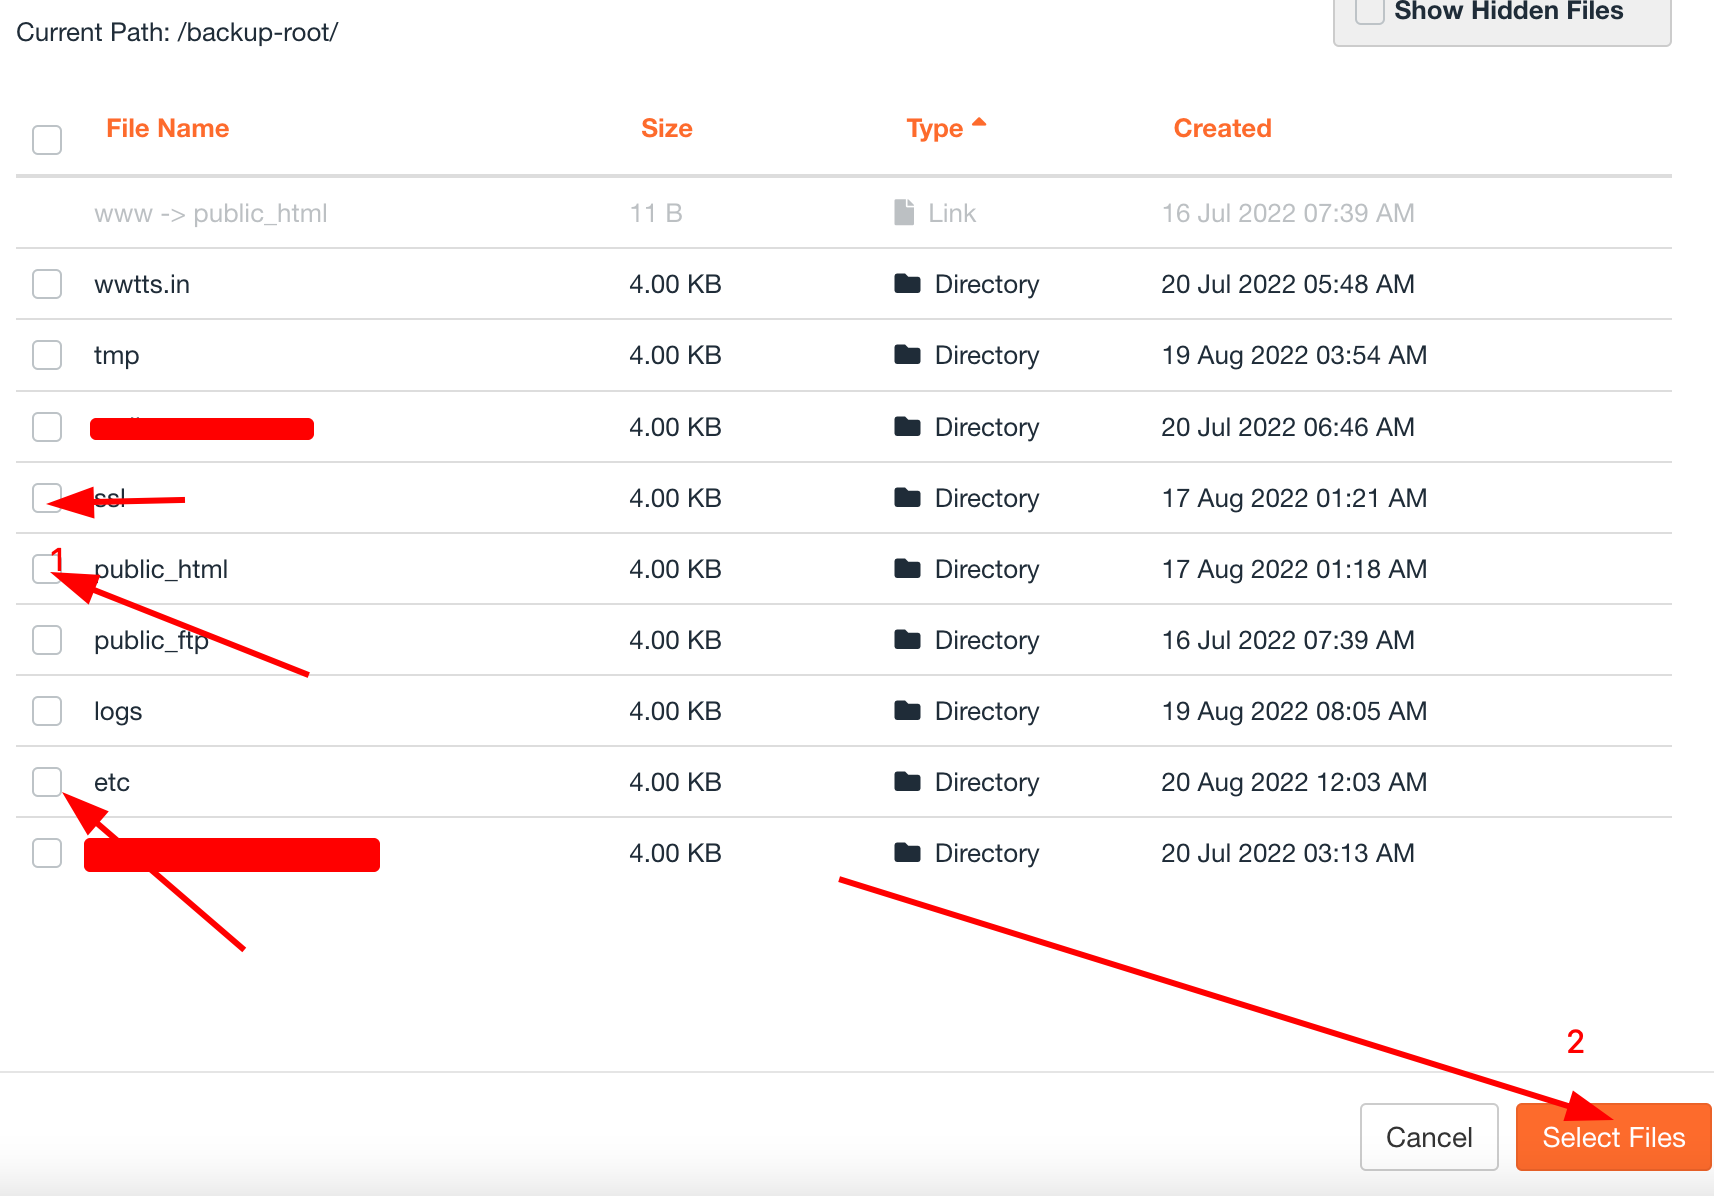
- You will be presented with all available restore points to choose from. Click on **File manager **

- Choose the directories you want to restore and proceed with the selection.
How to restore email backups
Jetbackup 5
- Login to your cPanel account
- Scroll down, or use the search bar and type Jetbackup 5 -> click on it
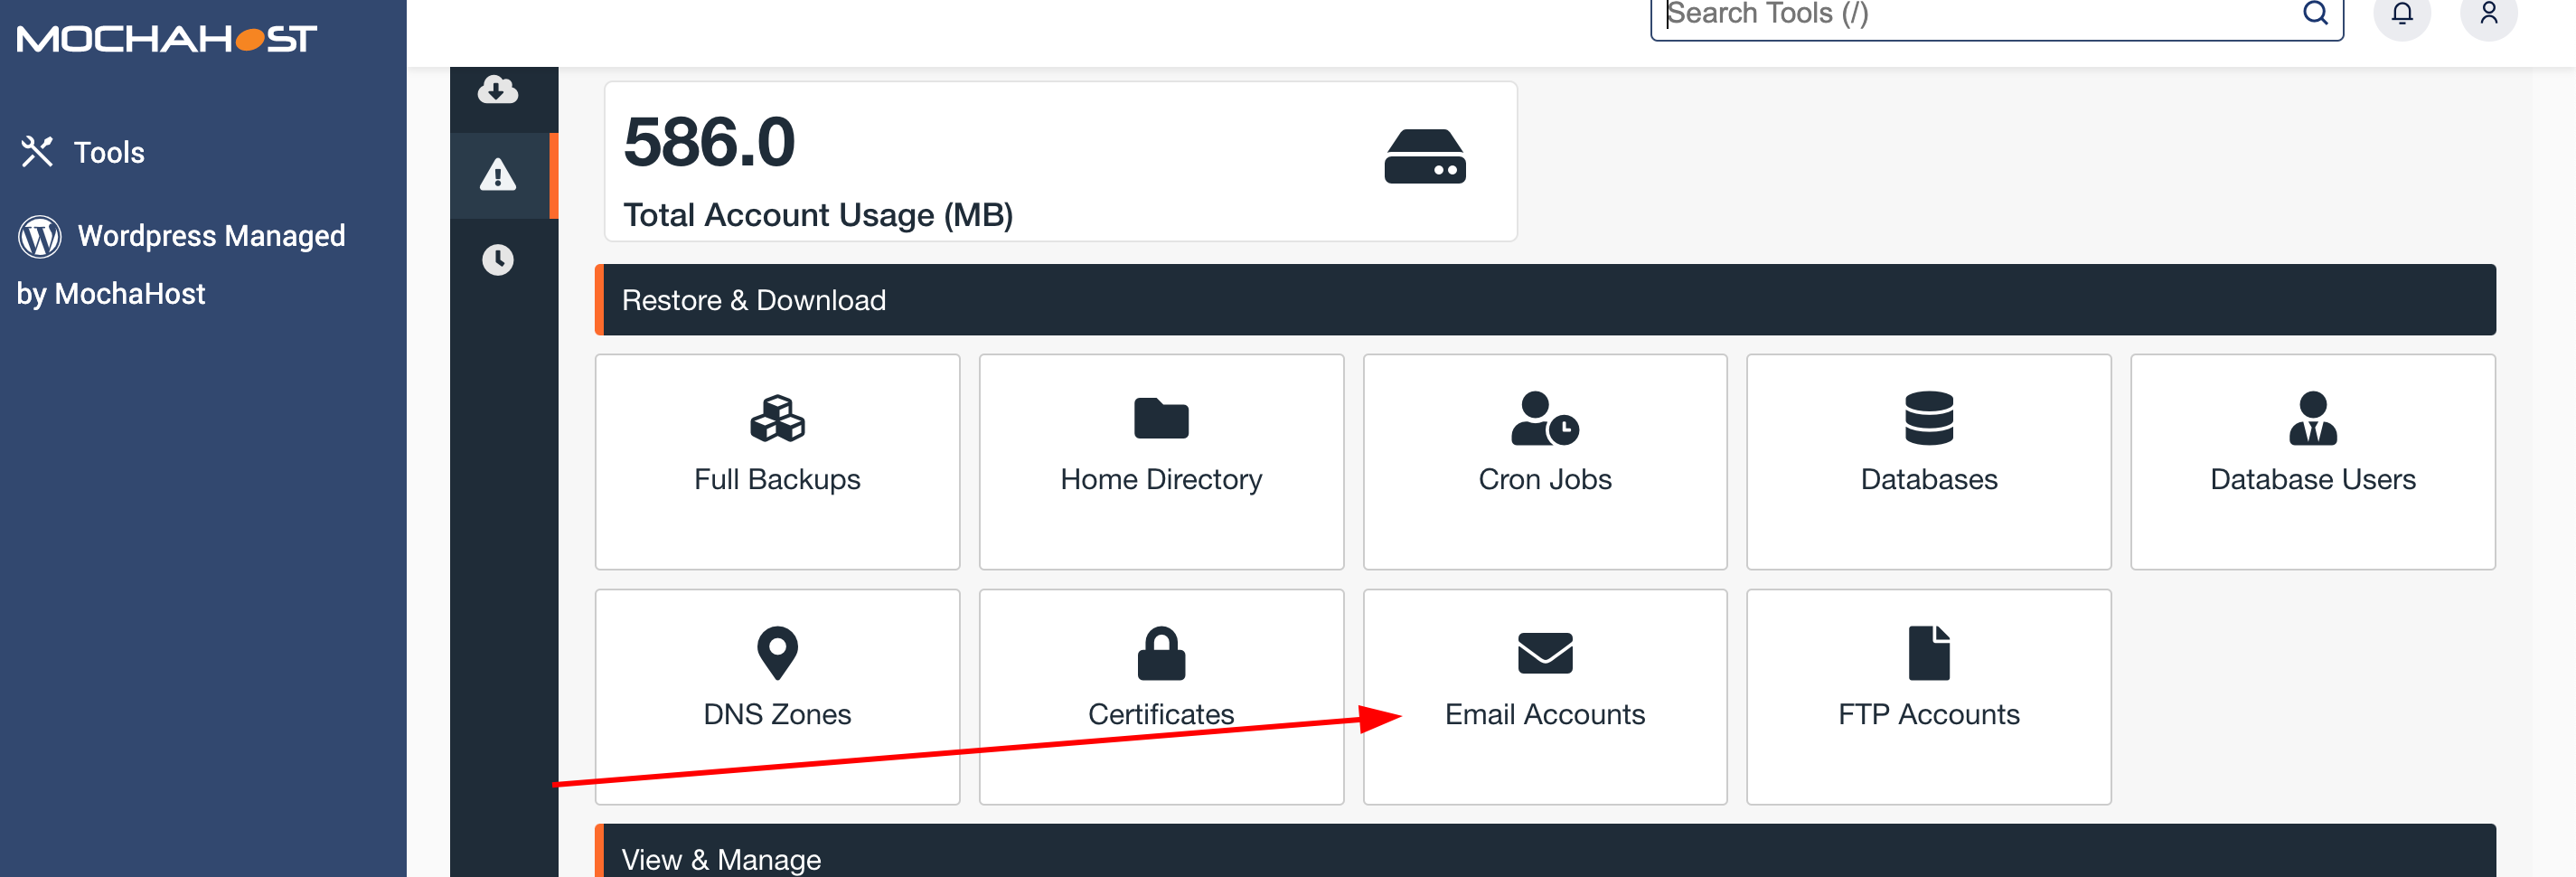
- Click on Email Accounts
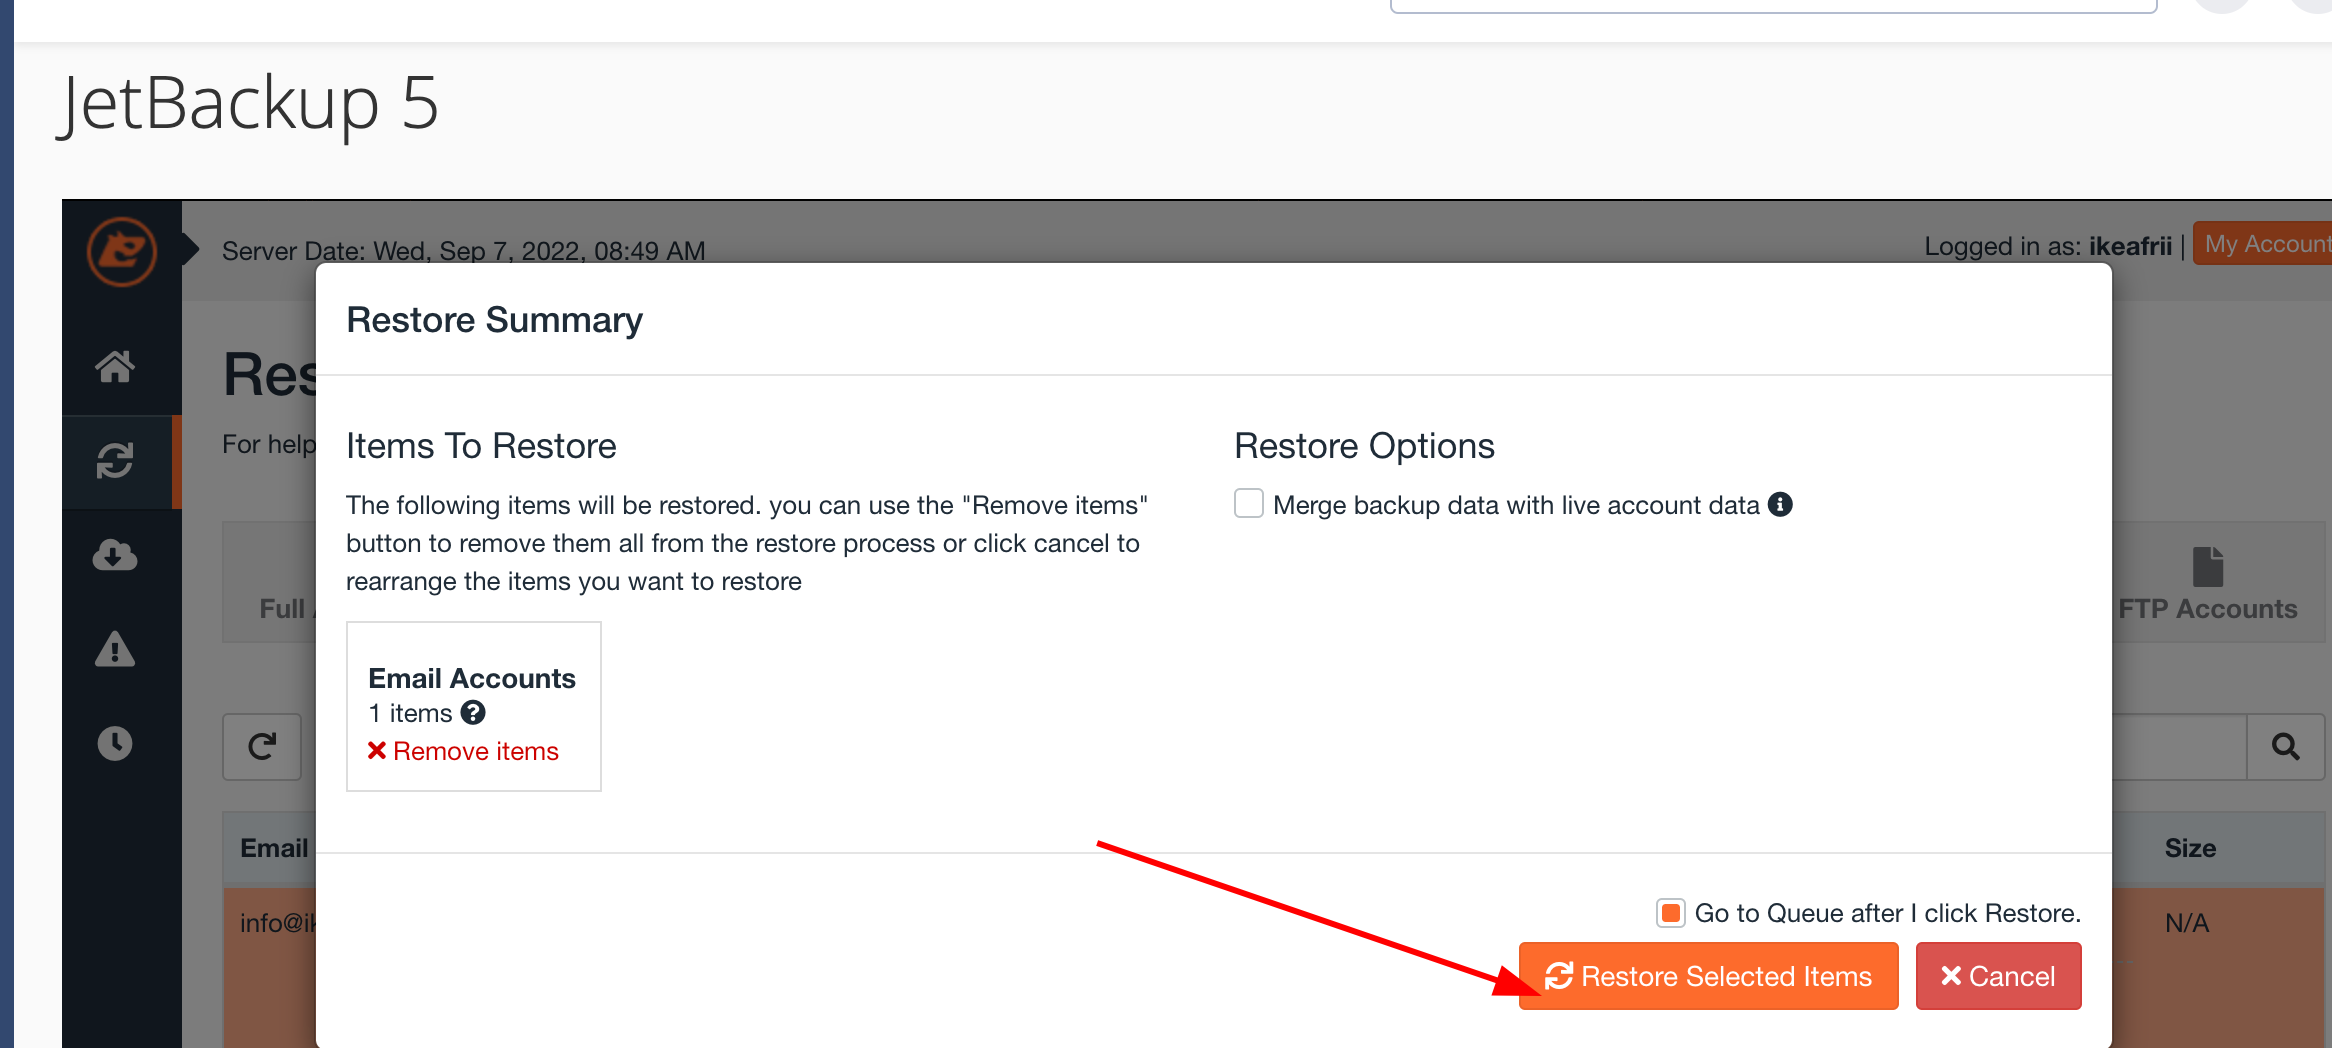
- Choose the desired backup and click on Restore.

- Click on Restore Selected Items
Jetbackup 4
- Login to your cPanel account
- Scroll down, or use the search bar and type Jetbackup -> click on it
- Click on Email backups
- Follow the steps bellow
How to perform a full account restoration
Jetbackup 5
- Login to your cPanel account
- Scroll down, or use the search bar and type Jetbackup 5 -> click on it
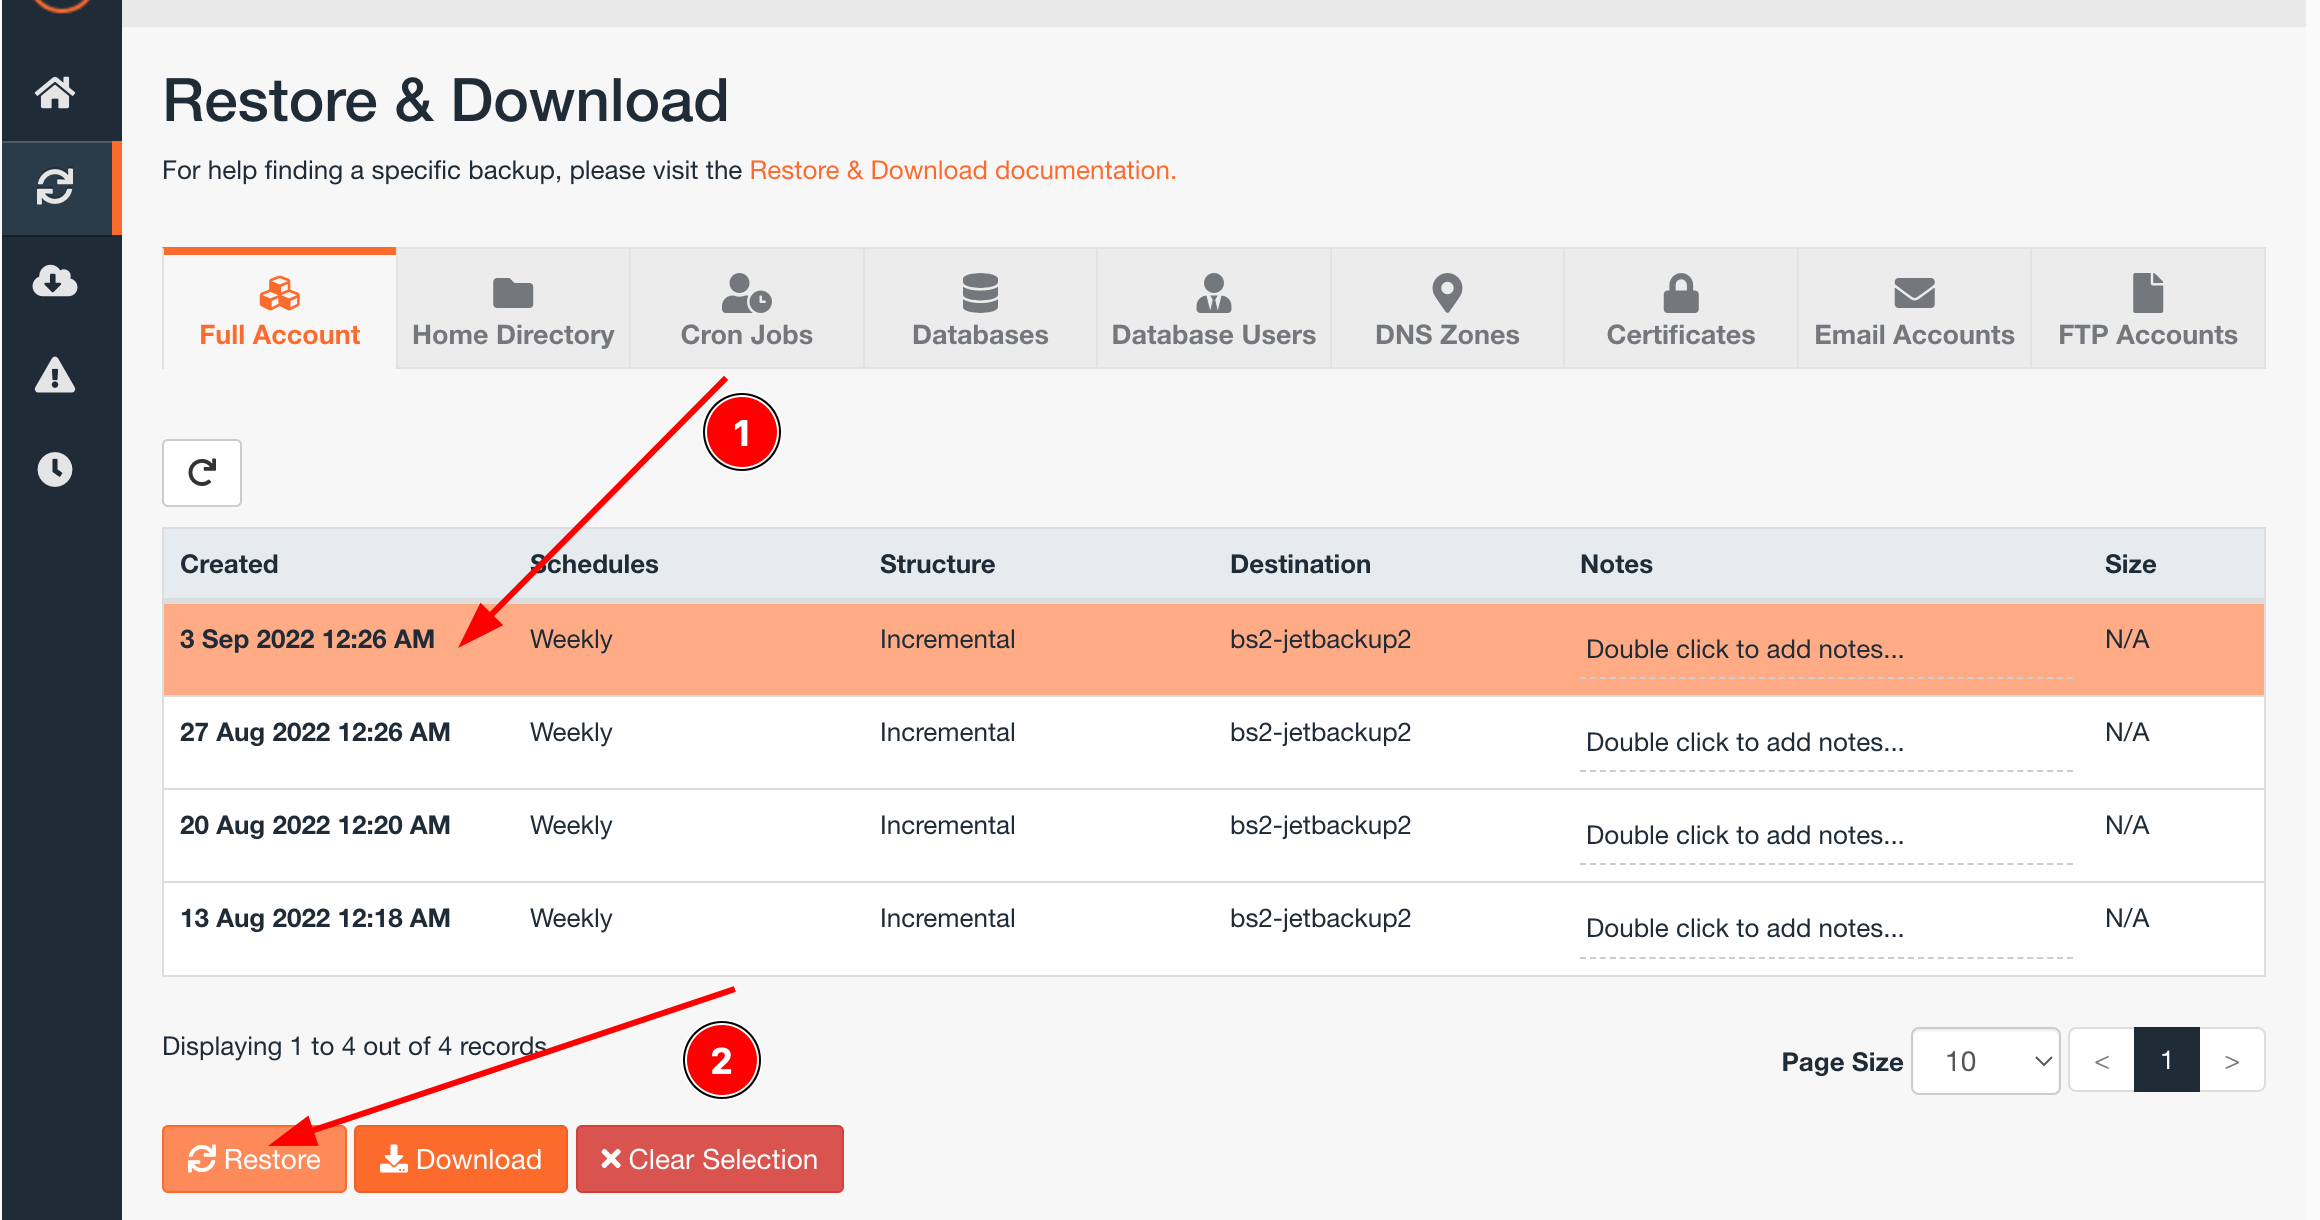
- From the navigation bar, click on Full Account tab
- Click on the desired restore point -> Click on Restore
- Choose which items to restore -> Click on Restore Selected Items
 You can also restore lost scheduled jobs (Cronjobs), SSL certificates and Database user from within the Jetbackup 5 interface. The process is identical, you just need to navigate through the Jetbackup tabs.
 IMPORTANT: SSL certificates and MySQL users cannot be restored by Jetbackup 4.