

- Make sure you have already created at least one e-mail account for your domain in cPanel or Plesk.
- Log in to the Gmail account.
-
Click the Gmail settings icon, and then click See All Settings:
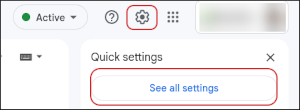
📘 Note The user interface displayed in these images may differ slightly from the version you have installed.
-
Click the Accounts and Import tab:

-
On the Accounts and Import tab, in the Check mail from other accounts section, click Add a mail account:

-
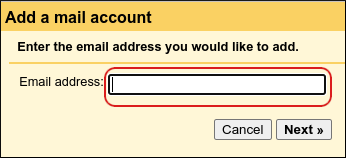
In the Email address text box, type the Mochahost e-mail address that you want to access from Gmail (for example, gmail@example.com ), and then click Next:
-
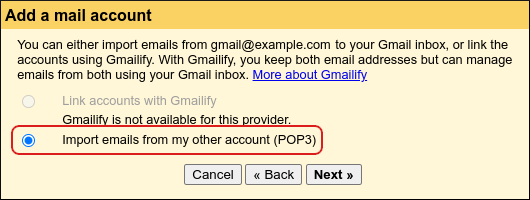
Click Import emails from my other account (POP3), and then click Next:
-
In the Username text box, type the full e-mail address of the Mochahost account (for example, gmail@example.com ):
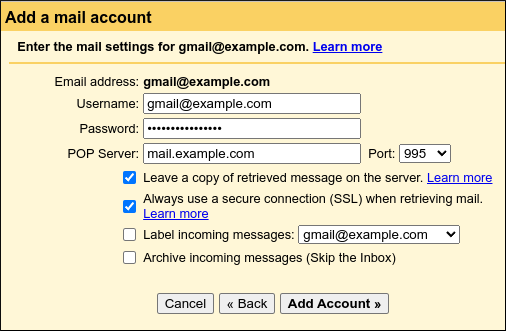
- In the Password text box, type the password for the Mochahost account.
- In the POP Server text box, type mail.example.com, where example.com represents your domain name.
- In the Port list box, select 995.
-
If you want to keep copies of messages on the Mochahost server, select the Leave a copy of retrieved message on the server check box.
📘 Note If you do not select this option, Gmail will download messages and automatically remove them from the Mochahost account.
- Select the Always use a secure connection (SSL) when retrieving mail check box.
- If you want to apply a label to messages, select the Label incoming messages check box and select a label.
- If you want to automatically archive new messages, select the Archive incoming messages (Skip the Inbox) check box.
- Click Add Account. You should receive a Your mail account has been added message. If you do not receive this message, verify the information you provided in steps 6 to 11, and then try again.
-
You can now retrieve messages from the Mochahost account.
- If you want to be able to send messages for the account from Gmail, click Yes and go to the next step.
-
If you do not want to send messages for the account from Gmail, click No, click Finish, and then you are done.
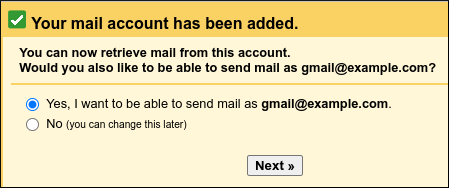
- If you selected Yes in the previous step, you must configure the outgoing mail server settings. Click Next.
-
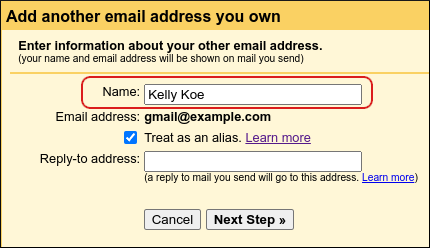
In the Add another email address you own dialog box, in the Name text box, type the name you want to appear on messages that you send from the account:
-
If you want to treat the account as an alias, select the Treat as an alias check box.
👍 Tip For detailed information about what this option does, please see https://support.google.com/a/answer/1710338.
- To specify a different reply-to address, type it in the Reply-to address text box.
- Click Next Step.
-
In the SMTP Server text box, type mail.example.com, where example.com represents your domain name:
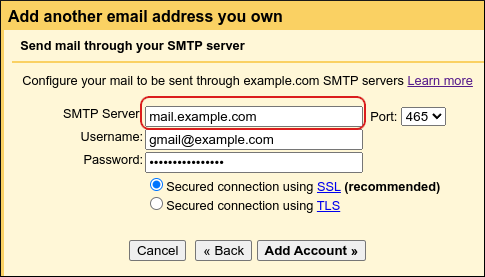
- In the Port list box, select 465.
- In the Username text box, type the full e-mail address of the Mochahost account (for example, gmail@example.com ).
- In the Password text box, type the password for the Mochahost account.
- Select the Secured connection using SSL option.
-
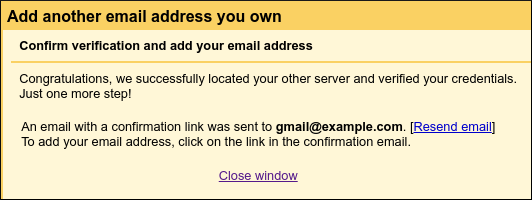
Click Add Account. You should receive a confirmation message:
-
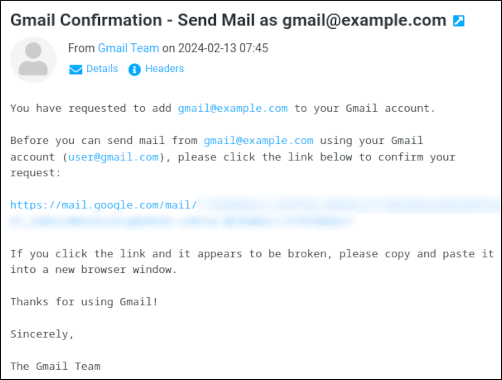
Check the inbox of the Mochahost account (for example, gmail@example.com ). There should be a message from Gmail that resembles the following:
-
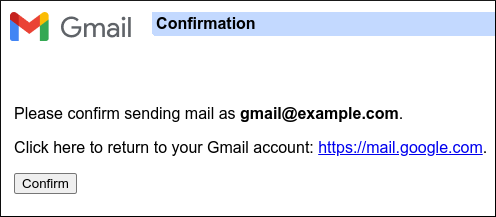
In your web browser, go to the link shown in the message. The following message appears:
-
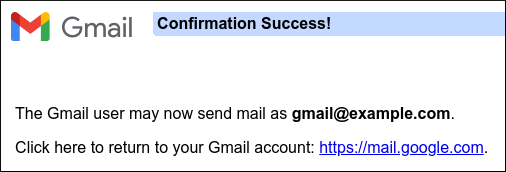
Click Confirm. The following confirmation message appears:
-
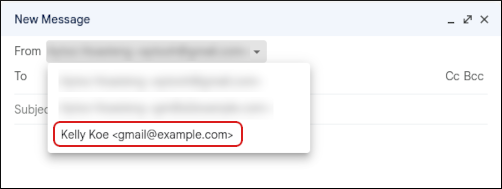
You are now ready to send email for your Mochahost account through Gmail. To do this, when you compose a message select the correct identity in the From list box:
E-mail Clients
Setting up Gmail to access your Mochahost e-mail account
Learn how to set up Gmail to access a Mochahost e-mail account.
This article demonstrates how to set up Gmail to access a Mochahost e-mail account. With Gmail access, you can view and manage both incoming and outgoing messages for your Mochahost account from the Gmail interface.
To set up Gmail to access a Mochahost e-mail account, follow these steps:
Was this page helpful?