

📘 This content originated from JavaPipe’s website. JavaPipe has now merged with Mochahost, providing an improved range of hosting services with added benefits and dependable service quality. Check out the fastest hosting plans here: Java Tomcat ServersThe purpose of this Spring MVC tutorial is to build a web-application utilizing the Spring MVC framework, including real world examples. This tutorial will be presented in multiple parts with each subsequent part building in more functionality such as using a Relational Database or adding use of Spring Security for authentication and authorization.
Table of Contents:
- Environment Details
- Spring MVC Tutorial: Setting up Tomcat
- Spring MVC Tutorial: Set Up the Project
- Create the Spring project folder
- Create the folder structure
- Deployment descriptor file (web.xml)
- Spring MVC Example Configuration File: mvc-dispatcher-servlet.xml
- Create the PurchaseRequestDTO and Service Classes
- Wireframes
- JSP (JavaServer Pages)
- Create the Controller
- Spring MVC Example: Completed Project File Structure
- Spring MVC Tutorial: Build and Deploy the Application
- Summary
- Part 2
Environment Details
- JDK 1.7
- Apache Tomcat 7
- Maven 3.x
- Ubuntu
Spring MVC Tutorial: Setting up Tomcat
Apache Tomcat is an open-source web server and servlet container for rendering Java Server Pages (JSPs) and executing servlets. Web applications can be deployed to a Tomcat server using WAR files (Java web archive files). Tomcat does not support the full EE stack and will not deploy EAR files. If you don’t have a place to run your Tomcat yet, you can check out JavaPipe’s Java web hosting offers and see if that’s what you’re looking for. For now let’s proceed on how to setup your own Tomcat container.Installing Tomcat
- Download the core tar.gz file from http://tomcat.apache.org/download-70.cgi
- Extract tar.gz file and copy to desired directory.
Running Tomcat
- Go to /opt/apache-tomcat-7.x/bin and execute startup.sh file.
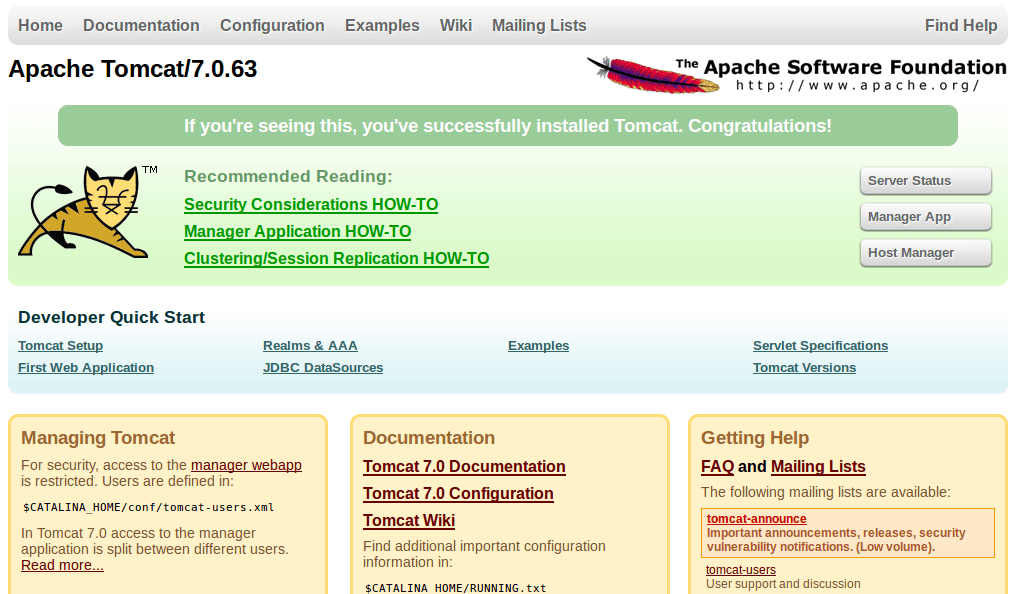
- Verify application server is running by going to localhost:8080/ and you should see this page:
Spring MVC Tutorial: Set Up the Project
This section of the article focuses on creating the file structure and configuration files required for this Spring application.Create the Spring project folder
Create a PurchaseRequestApp folder, in this case it was created under /home/alux/Projects but it can be put in any directory as long as you have read and write permissionCreate the folder structure
Create the following folder structure under the project folder (PurchaseRequestApp):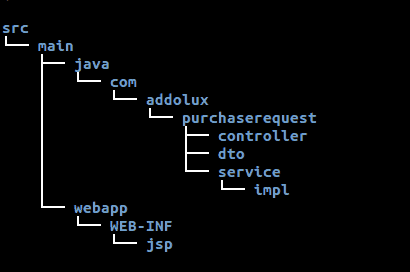 Create a maven build file (pom.xml) at the root of the project folder. The first dependency is spring-context which provides core Spring functionality including dependency injection.
The Spring MVC framework provides HTTP integration including an implementation of Spring MVC. The jstl artifact is required to be able to use jstl on JSP pages. pom.xml
Create a maven build file (pom.xml) at the root of the project folder. The first dependency is spring-context which provides core Spring functionality including dependency injection.
The Spring MVC framework provides HTTP integration including an implementation of Spring MVC. The jstl artifact is required to be able to use jstl on JSP pages. pom.xml
Deployment descriptor file (web.xml).
The deployment descriptor is used by Java web applications to determine how URLs are mapped to servlets. At this point all that is needed is to map Spring’s DispatcherServlet. The DispatcherServlet is responsible for invoking the correct handlers (for this application it will be a Controller) based on the incoming request URI. /webapp/WEB-INF/web.xmlThis file contains Spring Bean definitions and other Spring Context information.By default Spring looks for a application context configuration file /WEB-INF/${servlet-name}-servlet.xml for servlets defined in web.xml. The first thing required for this file will be the line which tells the application to look through the all the classes under com.addolux for Spring bean component annotations such as @Component or @Controller (which will be implemented later) and add them to the application context. Next a ViewResolver bean must be configured so that the views returned by controllers and be resolved to a JSP. /webapp/WEB-INF/mvc-dispatcher-servlet.xml
Create the PurchaseRequestDTO and Service Classes
At this point there is no persistence configured for this application and the service class will return dummy DTO data. com.addolux.purchaserequest.dto.PurchaseRequestDTOWireframes
JSP (JavaServer Pages)
I have utilized a front-end framework Bootstrap to add styling to the page. See http://getbootstrap.com for more information. /webapp/WEB-INF/jsp/myRequests.jspCreate the Controller
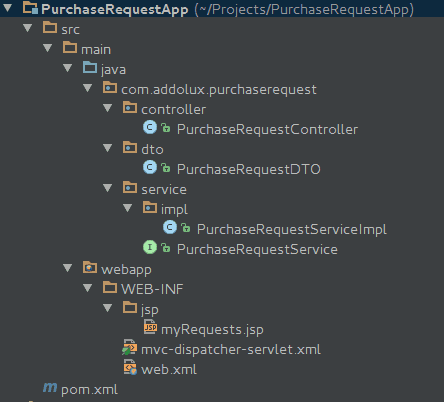
To render the jsp page using dynamic PurchaseRequestData a Controller class is implemented. For the PurchaseRequestController to be able to handle requests the annotations @Controller and @RequestMapping are required. The @Controller annotation configures the class as a Spring component intended to handle HttpRequests and @RequestMapping maps the request URI to specific handler methods and classes. To be able to handle a GET request for ${domain name}/purchase-request/myRequests the appropriate @RequestMapping values need to be added to the class and the method responsible for handling the request. The PurchaseRequestServiceImpl component can be injected by using @Resource which will by default look for a component named purchaseRequestService (which was done in previous steps). com.addolux.purchaserequest.controller.PurchaseRequestControllerSpring MVC Example: Completed Project File Structure
Spring MVC Tutorial: Build and Deploy the Application
To package the project into a war file go to the root of the project directory (where the pom.xml file is) and run the package command:View the Spring MVC Example Application
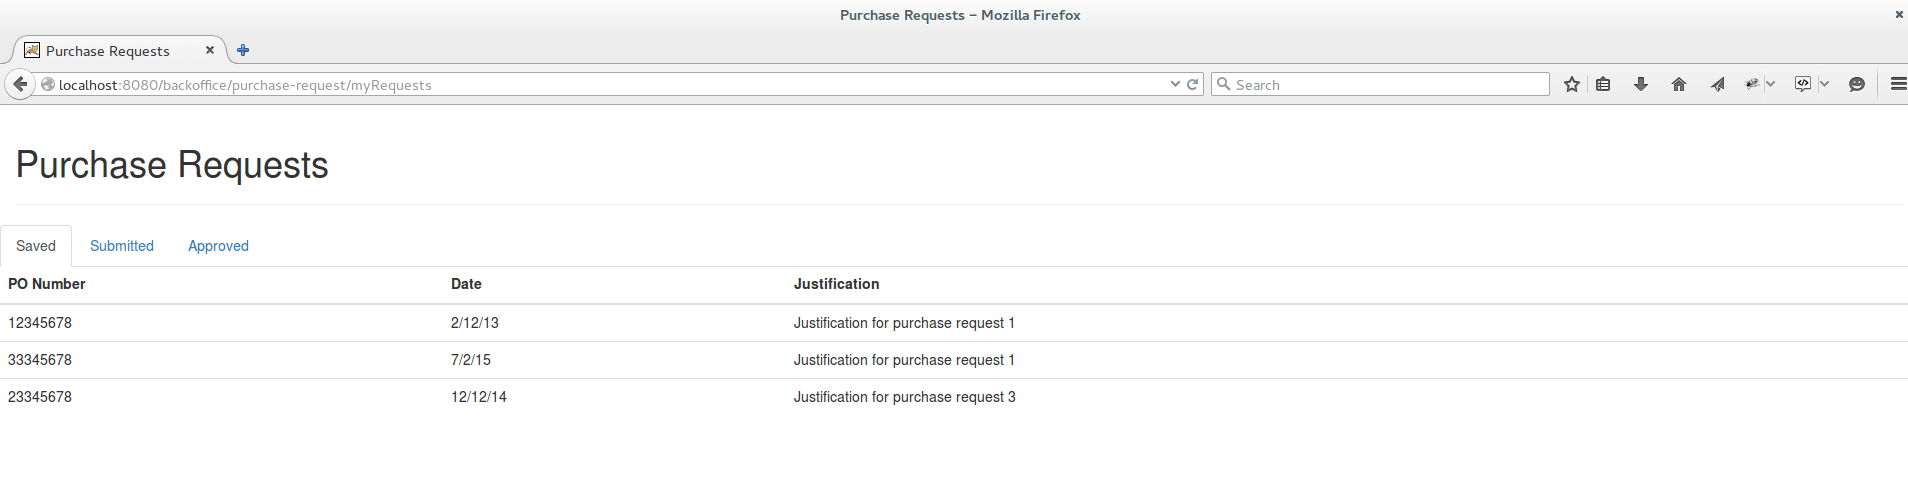
By default the context path of the application is the name of the war file so for the above war file the purchase requests page would be located at http://localhost:8080/backoffice/purchase-request/myRequests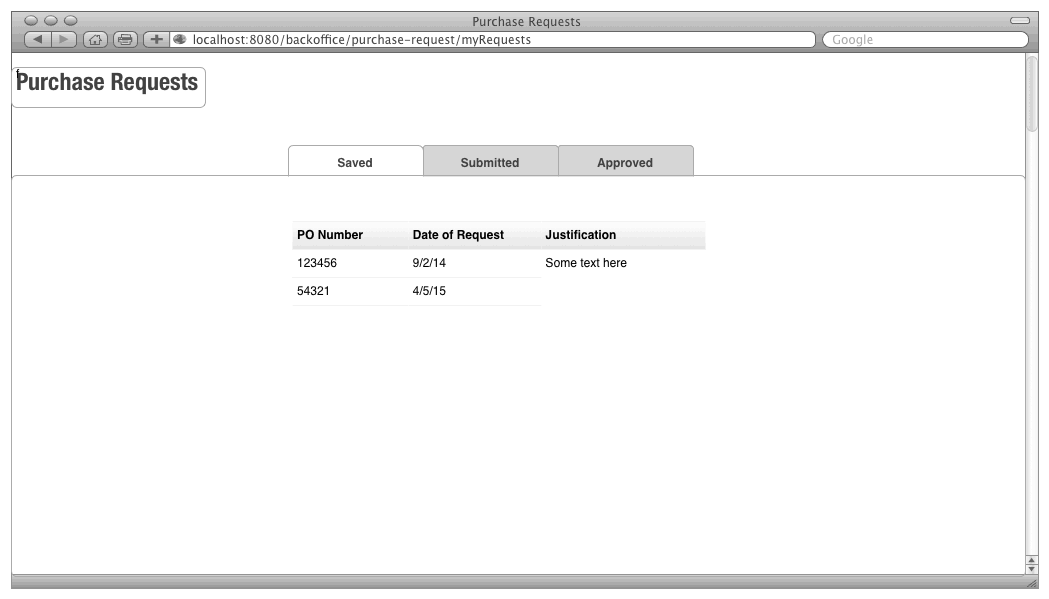
Summary
We have setup a Spring MVC application project from scratch developing the necessary configurations, Java classes, and JSP pages. We set up hosting for the Spring MVC framework to make our application available online. We have even demonstrated how to add model data from within the controller so that it would be available to our JSP. In the next part of our Spring MVC tutorial series we will be wiring the application to a relational database so that the same model data can added and retrieved from the database.Part 2
In this tutorial, I will show how to connect the Spring MVC application created in part 1 to a relational database (MySQL) and use Spring Data repositories and hibernate to save and retrieve data from the database. This uses an older version of Spring to keep consistent with part 1 but the concepts are still applicable to newer versions of Spring. In particular, the XML based configuration is something that I have seen the Spring community move away from and towards Java based configurations. In the next part of this series, I will migrate this application to Spring Boot and use the latest stable versions of everything. Also, I intentionally doing things like packaging the application and manually moving it to Tomcat so you can get an idea of how things work. In a real Java web development environment, you would want to automate these steps using a maven plugin to package a war file before uploading to your tomcat webapps directory. If you use Spring Boot you don’t have to worry about this at all as it has its own embedded application server, but I will go into more detail about that in part 3. The first step will be to update the pom.xml file to update the Spring version by updating the below property.4.3.22.RELEASE
The next step will be to add the necessary Hibernate, JPA, and MySQL connector dependencies. I will just give a quick overview of what these are.
Spring Data: From Spring’s website “Spring Data] is an umbrella project which contains many sub projects that are specific to a given database”. Basically, it provides modules that allow your Spring application to interact with data access technologies in a consistent way using the Repository abstraction.
This could be relational, NoSQL, or even search engines like Solr. I am going to use the JPA module to interact with a MySQL database for this tutorial. JPA itself is just a specification, we will need to use an implementation of that specification and I am going to use Hibernate since that is the most widely used.
We will also need the drivers to allow Java to communicate with the database.
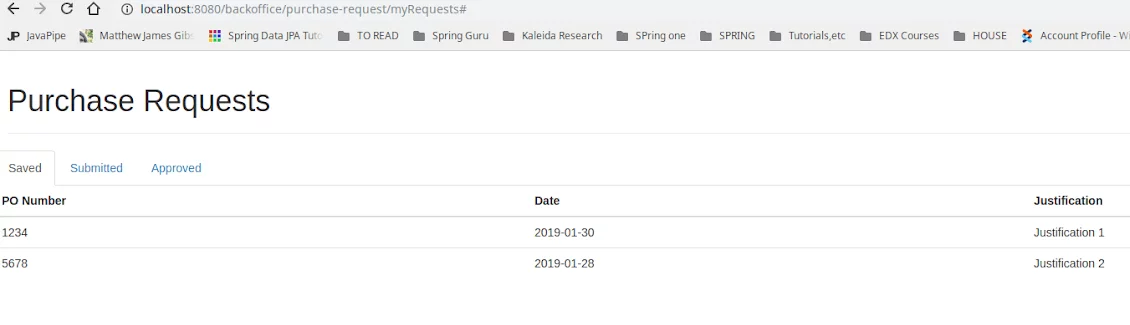 That was an overview of configuring some basic persistence functionality provided by Spring Data and Hibernate.
Something to keep in mind is that in simple cases like this with one table ORM’s like Hibernate are very easy to use but as the number of tables and general complexity of your data model increases they can become much more difficult to work with.
In this case, you could use a Java framework like QueryDsl or JOOQ to build complex queries programmatically or look into the Spring Data JDBC module which is a much simpler ORM
That was an overview of configuring some basic persistence functionality provided by Spring Data and Hibernate.
Something to keep in mind is that in simple cases like this with one table ORM’s like Hibernate are very easy to use but as the number of tables and general complexity of your data model increases they can become much more difficult to work with.
In this case, you could use a Java framework like QueryDsl or JOOQ to build complex queries programmatically or look into the Spring Data JDBC module which is a much simpler ORM