

Article Details
- Product: All accounts
- Level: Beginner
Installing Sticky Menu Plugin for WordPress
To install and configure StickyMenu Plugin, follow these steps:- Log in to your WordPresssite with an administrator account.
-
On the
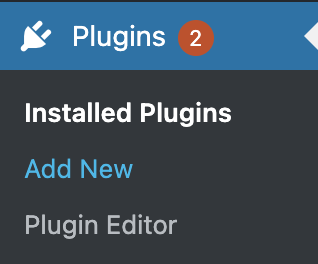
Dashboardin the left sidebar, clickPlugins, and then clickAdd New:
-
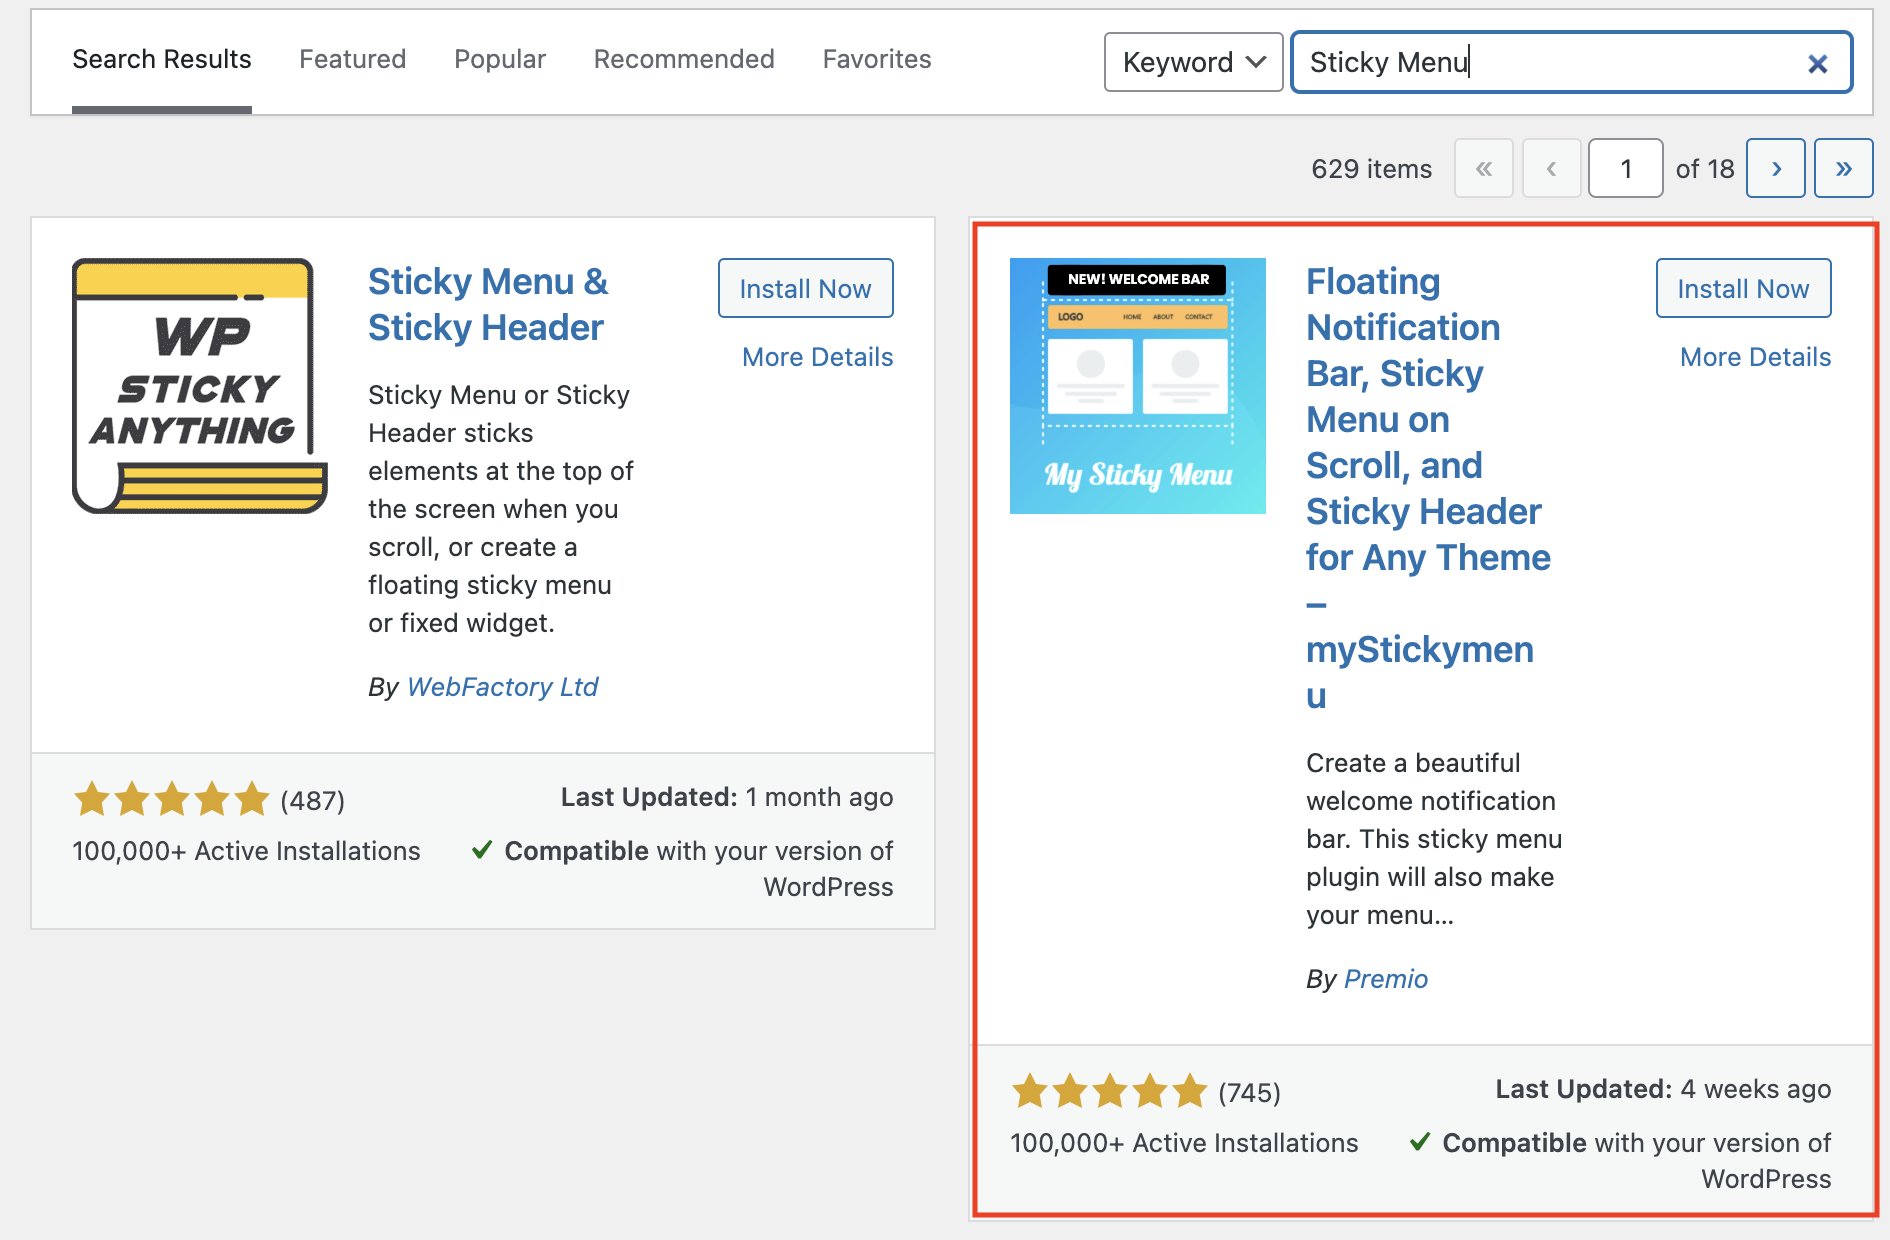
Search for “Sticky Menu” click
Install, and then clickActivatethe plugin:
- On the
Dashboardin the left sidebar, clickAppearance, and then click onSticky Menu:
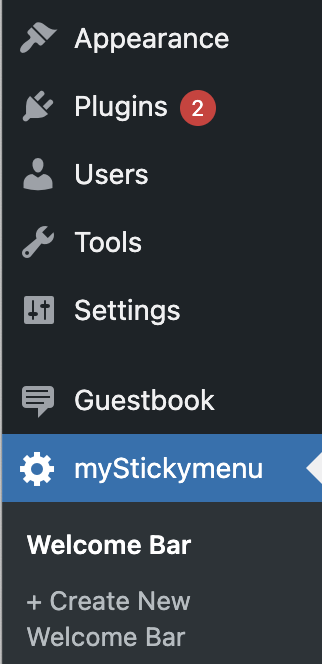
- There are a few sticky menu options given on this page. The free version allows you to have a sticky welcome bar and a sticky menu:
- Click on
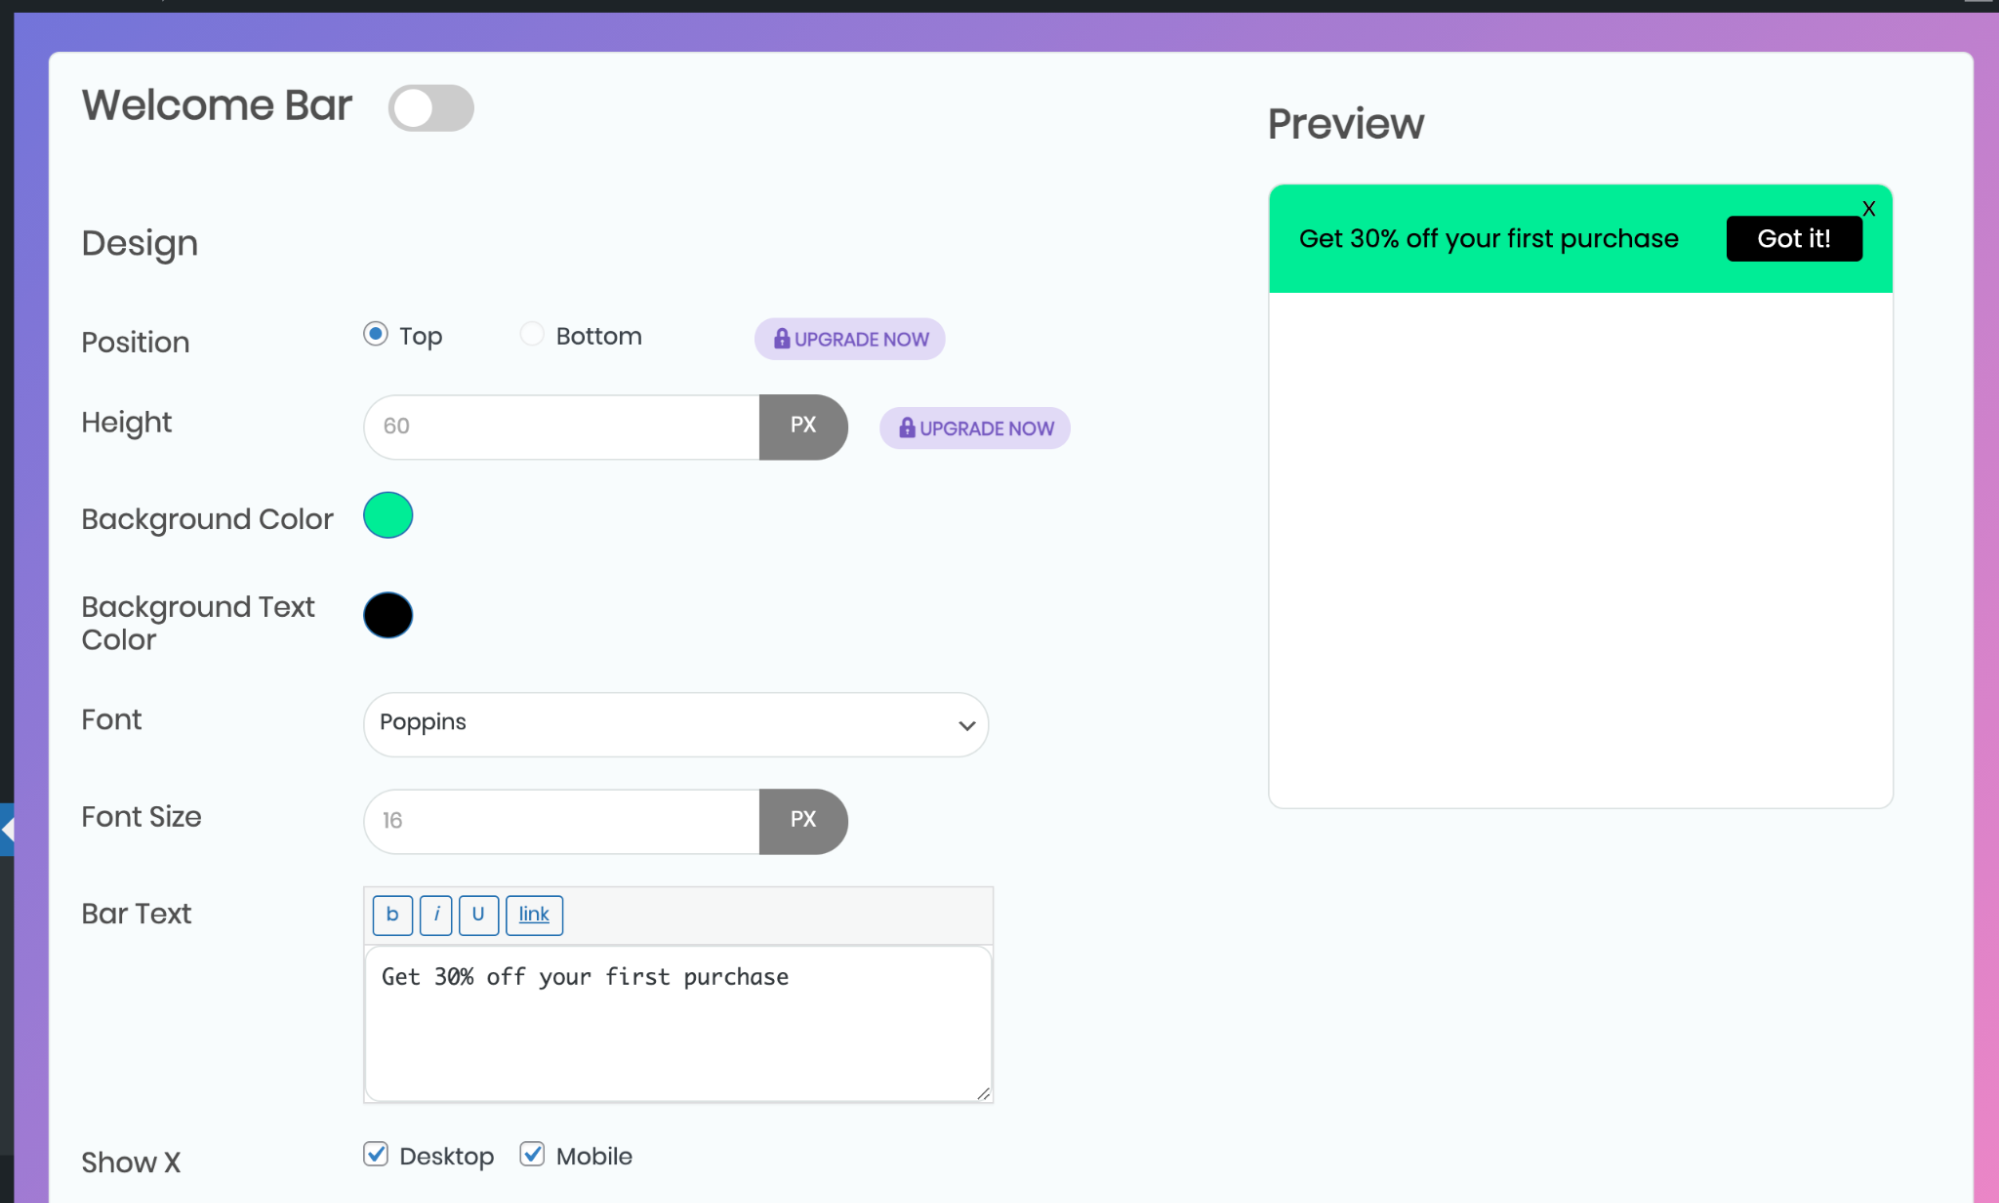
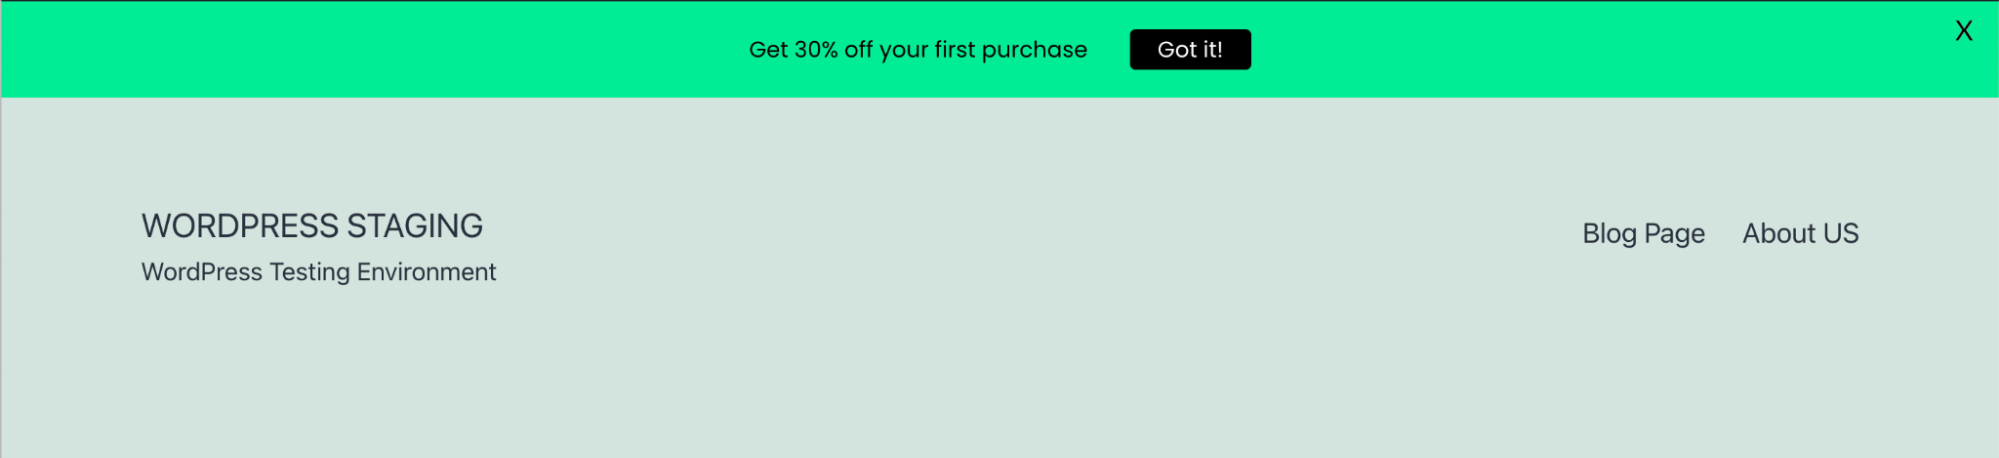
Welcome Barand edit the settings, and then click on theSave Buttonto create aWelcome Barfor the WordPress Site:
- Click on the
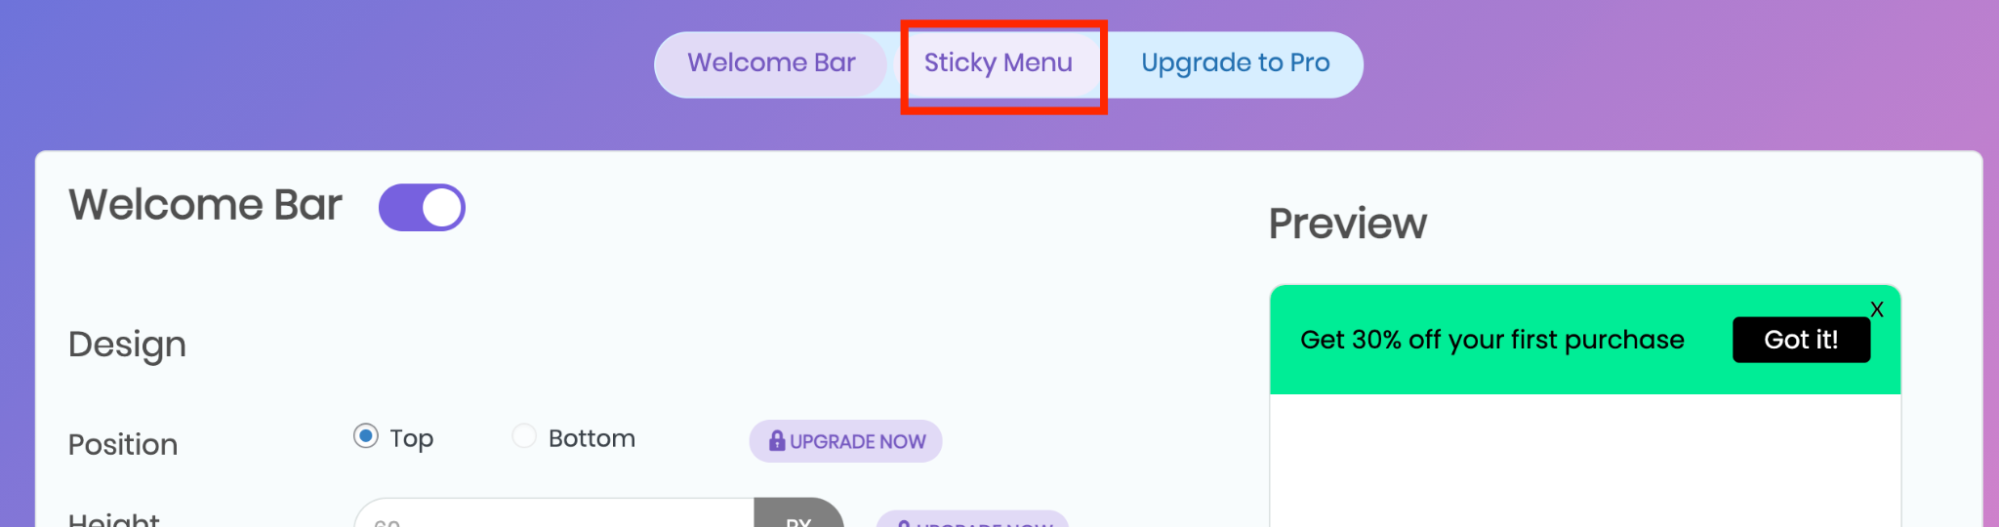
Sticky Menu, and then select the menu from the dropdown under theSticky Classsection.
- Choose
Other Class Or IDfrom the downtown. Paste the headers class ID in the textbox:

-
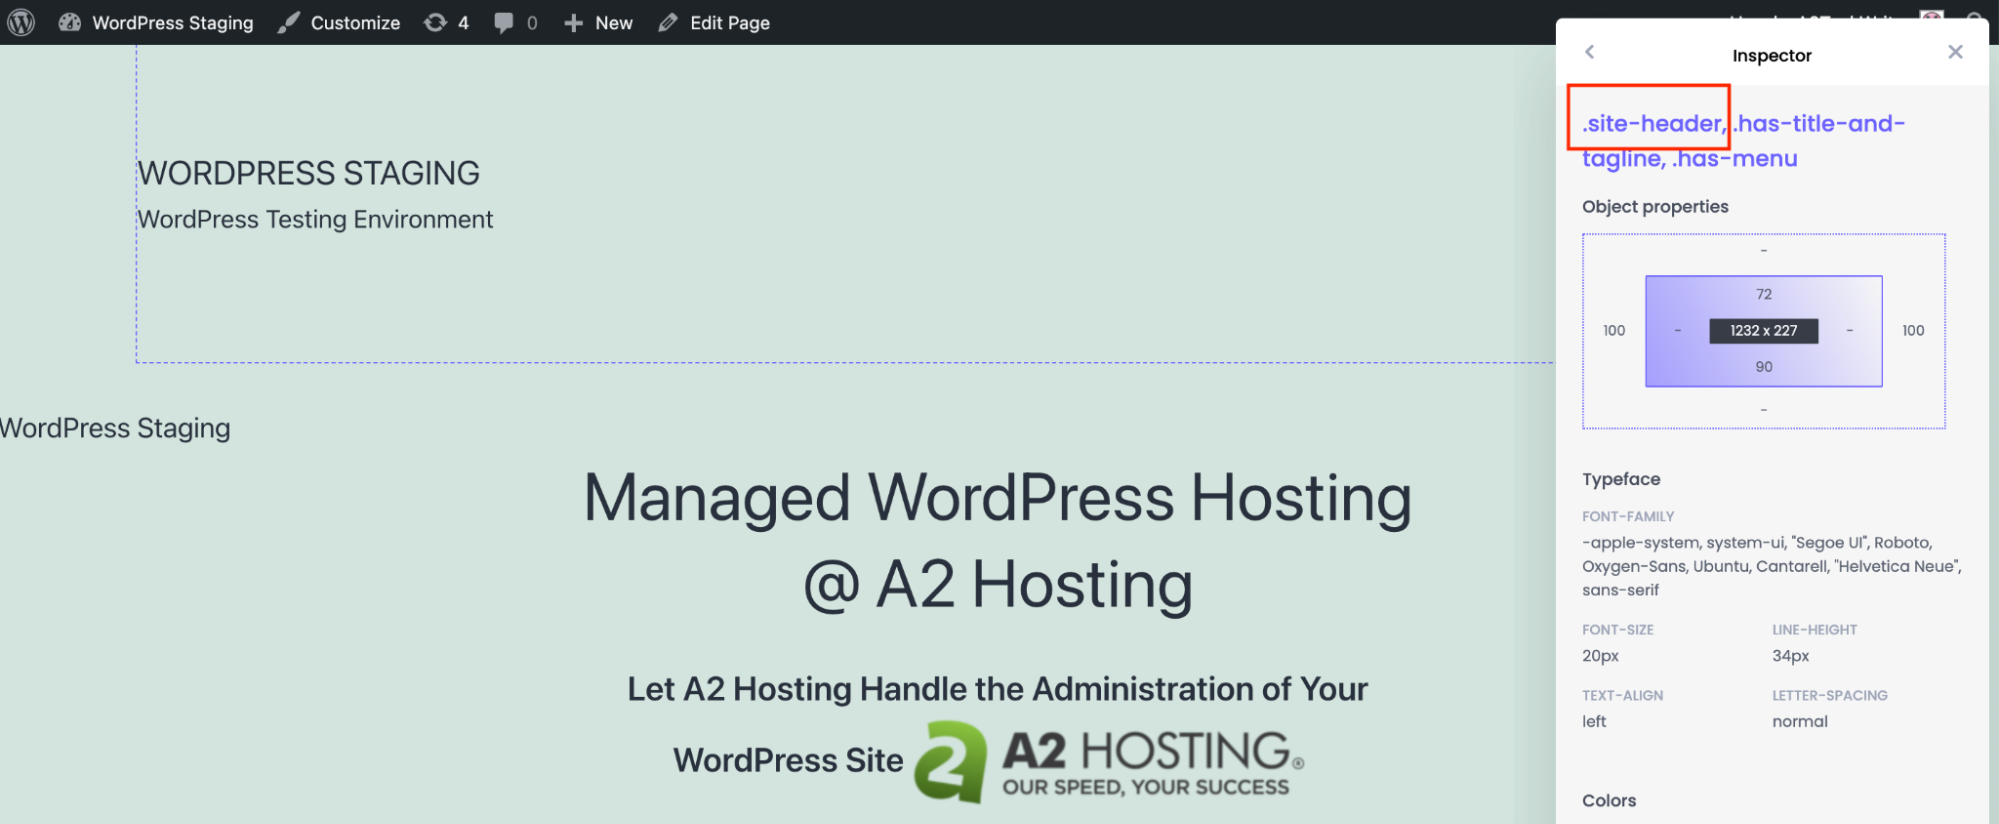
👍 Tip To retrieve the CSS id for the header, install the CSS Peeper extension on Google Chrome. Click on the header and copy the class name for header:
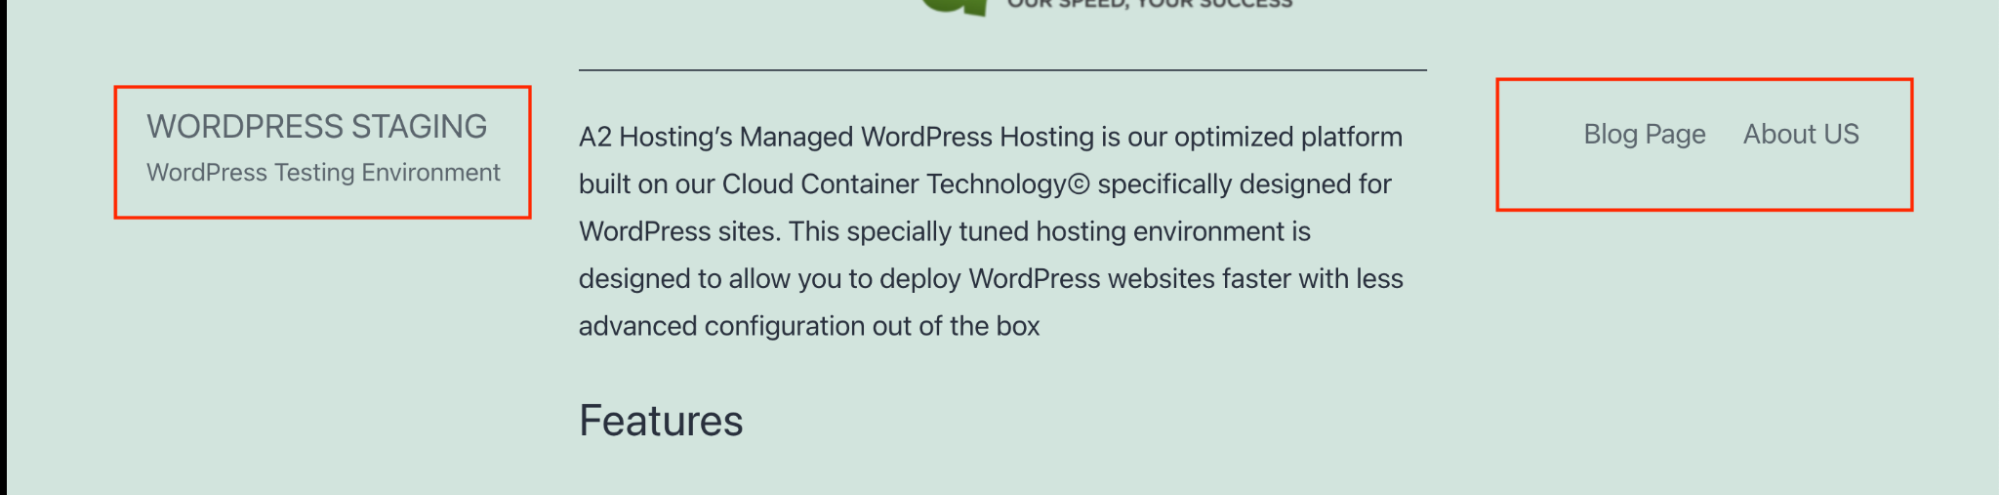
- Paste the class name in the text field:

- Next set the rest of the parameters and click
Saveto save the changes:
More Information
For more information about the MyStickyMenu plugin please visit:Related Articles
- Adding a custom logo to WordPress
- Appointment booking system for WordPress
- Broken image links in WordPress
- Changing the WordPress theme manually
title: “How to fix the Heartbleed vulnerability on unmanaged servers”
slug: “how-to-fix-the-heartbleed-vulnerability-on-unmanaged-servers”
excerpt: “Learn everything you need to know about how the “Heartbleed” vulnerability affects your server. Follow our easy guide to fix the heartbleed vulnerability.”
author: “Chris C.”
hidden: true
metadata:
title: “How to fix the Heartbleed vulnerability on unmanaged servers”
description: “Learn everything you need to know about how the “Heartbleed” vulnerability affects your server. Follow our easy guide to fix the heartbleed vulnerability.”
keywords: “heartbleed vulnerability, how to fix heartbleed vulnerability”
robots: “noindex”
createdAt: “Fri Apr 11 2014 00:00:00 GMT+0000 (Coordinated Universal Time)“
updatedAt: “Fri Apr 11 2014 00:00:00 GMT+0000 (Coordinated Universal Time)“
Article Details
- Product: Unmanaged Dedicated ServerUnmanaged VPS
- Level: Intermediate
❗️ Important
The information in this article only applies to the products listed in theArticle Details> sidebar. You must have root access to the server to follow the procedures described below.
📘 Note Information in this article about unmanaged dedicated servers is only for customers who purchased those plans before May 27, 2024. As of that date, unmanaged dedicated servers are no longer available. Our new managed dedicated server plans feature more powerful hardware to meet your hosting needs. To view available dedicated hosting options, please visit
About “Heartbleed”
The well-publicized “Heartbleed” vulnerability is a bug in certain versions of the OpenSSL library. If your unmanaged server is running one of the following operating system templates, it may be vulnerable:- CentOS 6.5
- Debian 7 (Wheezy)
- Ubuntu 12.04
📘 Note If you have automatic updates enabled on your server, then it has likely already been patched. To run an online test and determine whether or not a particular server is vulnerable, please visit .
Fixing the vulnerability
If your server is running one of the affected operating system templates listed above, follow the appropriate procedures below.CentOS 6.5
To fix the HeartBleed vulnerability on CentOS 6.5, follow these steps:- Install the latest updates on the server. For detailed information about how to do this, please see this article.
- Reboot the server orselectively restart any affected services: Web servers:
- To restart the Apache web server, type the following commands:
- To restart the Nginx web server, type the following commands:
- To restart MySQL, type the following commands:
- To restart PostgreSQL, type the following commands:
- To restart Postfix, type the following commands:
- To restart Exim, type the following commands:
- Run the online test at http://filippo.io/Heartbleedto confirm that the server is no longer vulnerable.
Debian 7 and Ubuntu 12.04
To fix the HeartBleed vulnerability on Debian 7 (Wheezy) or Ubuntu 12.04 (Precise Pangolin), follow these steps:- Install the latest updates on the server. For detailed information about how to do this, please see this article.
- Reboot the server orselectively restart any affected services: Web servers:
- To restart the Apache web server, type the following commands:
- To restart the Nginx web server, type the following commands:
- To restart MySQL, type the following commands:
- To restart PostgreSQL, type the following commands:
- To restart Postfix, type the following commands:
- To restart Exim, type the following commands:
- Run the online test at http://filippo.io/Heartbleedto confirm that the server is no longer vulnerable.
More Information
For detailed information about the “Heartbleed” vulnerability, please visit this.Related Articles
title: “How to update WordPress plugins”
slug: “how-to-update-wordpress-plugins”
excerpt: “This article explains how to update WordPress plugins. Keeping WordPress plugins up-to-date is important to help ensure site security and performance.”
author: “snagappan”
hidden: true
metadata:
title: “How to update WordPress plugins”
description: “This article explains how to update WordPress plugins. Keeping WordPress plugins up-to-date is important to help ensure site security and performance.”
keywords: “WordPress, update, plugin”
robots: “noindex”
createdAt: “Fri Jan 28 2022 00:00:00 GMT+0000 (Coordinated Universal Time)“
updatedAt: “Thu Mar 13 2025 23:57:13 GMT+0000 (Coordinated Universal Time)“
Article Details
- Product: All accounts
- Level: Beginner
Updating WordPress plugins
To manually update plugins in WordPress, follow these steps:- Log in to WordPress as the administrator.
-
On the
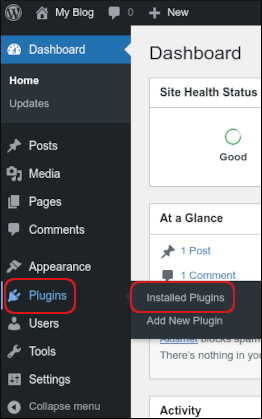
Dashboardsidebar, clickPlugins, and then clickInstalled Plugins:
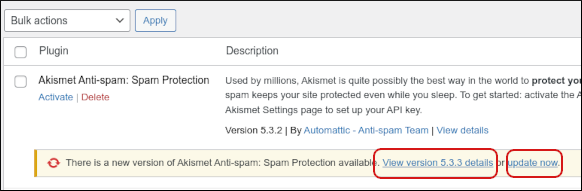
- The plugin page lists of all the plugins that have been installed. When there is an update available for a plugin, a notification appears:
- To update the plugin immediately, click
update now. - To review details about the plugin, click
View version details. In the details dialog box, to update the plugin, clickUpdate Now.
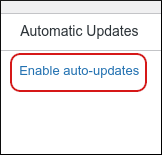
👍 TipTo ensure your plugins are updated quickly and automatically, in the
Automatic Updatescolumn, clickEnable auto-updates. Enabling automatic updates helps keep your site secure by installing updates when they become available, without the need for manual updating.
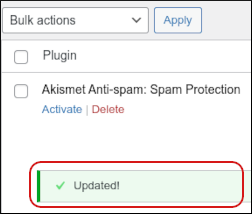
- When the update is complete, the notification changes to
Updated!:
More Information
For more information about WordPress plugin management, please see .Related Articles
- Configuring WordPress date and time settings
- Creating Legal Pages in WordPress
- Dark mode for WordPress
title: “How to install Adminer using Softaculous”
slug: “how-to-install-adminer-using-softaculous”
excerpt: “Adminer makes it easy to manage your databases! Learn how to install the Adminer database management interface on your site using the Softaculous installer in cPanel.”
author: “Chris C.”
hidden: true
metadata:
title: “How to install Adminer using Softaculous”
description: “Adminer makes it easy to manage your databases! Learn how to install the Adminer database management interface on your site using the Softaculous installer in cPanel.”
keywords: “adminer, setup, install”
robots: “noindex”
createdAt: “Mon Aug 31 2015 00:00:00 GMT+0000 (Coordinated Universal Time)“
updatedAt: “Fri Mar 14 2025 00:10:47 GMT+0000 (Coordinated Universal Time)“
Article Details
- Product: All managed hosting accounts
- Level: Intermediate
📘 Note This application is only available in Softaculous Premium. If you need further assistance, please open a ticket at
my.a2hosting.com .
Installing Adminer
You can get Adminer up and running in minutes by using the Softaculous application installer in cPanel. To install Adminer using Softaculous, follow these steps:-
Log in to cPanel.
📘 Note If you do not know how to log in to your cPanel account, please see
this article . - Open Softaculous:
- If you are using the Jupitertheme, on the
Toolspage, in theSoftaculous Apps Installersection, clickSoftaculous Apps Installer(or any of the icons underScriptsorCategories). - If you are using the Paper Lanterntheme, in the
SOFTACULOUS APPS INSTALLERsection of the cPanel home screen, clickSoftaculous Apps Installer(or any of the icons underScriptsorCategories).
-
In the
Searchtext box, typeadminerand then press Enter.📘 Note Alternatively, you can use the navigation pane on the left side. To do this, click
DB Tools> , and then click
Adminer> . -
Click
Install. The installation page appears. -
In the
Choose Protocollist box, select the protocol.📘 Note If you have an SSL certificate installed on your site, select
https://> or
https://www> . If you do not have an SSL certificate installed on your site, select
http://> or
http://www> . -
In the
Choose Domainlist box, select the domain for installation, or accept the default value. -
In the
In Directorytext box, type the directory where you want to install the application, or accept the default value.👍 Tip If you want your domain name to go directly to the application, make sure the
In Directory> text box is blank. -
Click the

Advanced Options.
- If you do not want to receive e-mail notifications when application updates are available, select the
Disable Update Notifications Emailscheck box.
❗️ Important A2 Hosting
strongly> recommends that you receive e-mail notifications when application updates are available. Keeping your site updated helps prevent unauthorized access attempts and data loss.
- To automatically update the application when updates are available, select the
Auto Upgradecheck box. - In the
Backup Locationlist box, you can select a location to store application backups. - In the
Automated backupslist box, you can select whether or not Softaculous makes periodic backups of your application. - In the
Backup Rotationlist box, you can select how often Softaculous overwrites the oldest backup file with a new backup file. - To receive site configuration information after the installation is complete, type an e-mail address in the
Email installation details totext box. - Review the installation options and settings, and then click
Install. When installation is complete, Softaculous provides information about the application’s configuration.
Accessing your databases
To use Adminer to access your databases, follow these steps:-
Use your web browser to go to the Adminer login URL.
📘 Note Softaculous provided the login URL when you installed Adminer.
-
In the
Systemlist box, select one of the following:
- To access a MySQL database, select
MySQL. - To access a PostgreSQL database, select
PostgreSQL.
📘 Note The other listed database types are not supported at this time.
- Confirm that the
Servertext box value is set tolocalhost. - In the
Usernametext box, type a valid username for the database you want to access. - In the
Passwordtext box, type the password for the user you specified in step 4. - In the
Databasetext box, type the name of the database that you want to access. - Click
Login. If you specified correct and valid login credentials, Adminer logs in to the database. You can browse tables, view and edit specific rows in the database, and more.
More Information
For more information about Adminer, please visit www.adminer.org .Related Articles
title: “How to add new domains and subdomains in Plesk”
slug: “how-to-add-new-domains-and-subdomains-in-plesk”
excerpt: “Get tips on how to add a new domain in Plesk, allowing you to subsequently add subdomains. Included are instructions on adding domain aliases and forwarding domains.”
author: “Chris C.”
hidden: true
metadata:
title: “How to add new domains and subdomains in Plesk”
description: “Get tips on how to add a new domain in Plesk, allowing you to subsequently add subdomains. Included are instructions on adding domain aliases and forwarding domains.”
keywords: “hosting, web hosting, linux hosting, vps hosting, fast hosting, wordpress hosting”
robots: “noindex”
createdAt: “Thu Oct 13 2016 00:00:00 GMT+0000 (Coordinated Universal Time)“
updatedAt: “Fri Mar 14 2025 00:22:52 GMT+0000 (Coordinated Universal Time)“
Article Details
- Operating System: Linux Hosting
- Control Panel: Plesk
- Product: Managed WordPress with Plesk
- Level: Beginner
📘 Note Plesk is no longer included with new A2 Hosting plans, but it is still available on legacy Managed WordPress accounts. You can install Plesk manually on unmanaged VPS and Dedicated servers.
Adding a new domain
To watch a video that demonstrates the following procedure, please click below: To add a new domain in Plesk, follow these steps:-
Log in to Plesk.
📘 Note If you do not know how to log in to your Plesk account, please see
this article . -
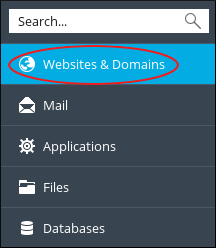
In the left sidebar, click
Websites & Domains:
-
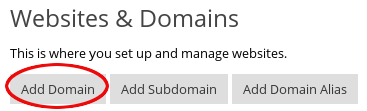
Click
Add Domain:
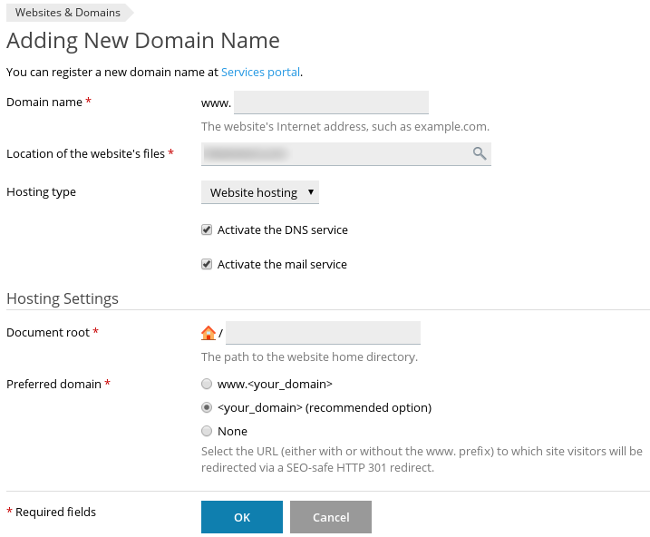
Adding New Domain Name page appears:
- In the
Domain nametext box, type the domain name for the site. - In the
Hosting typelist box, select one of the following options:
Website hosting:This option enables you to host a website and e-mail services.Forwarding:This option enables you to redirect traffic from one site to another site. For more information, please see Adding a new forwarding domain below.No hosting:This option enables you to host DNS and e-mail services, but not a website.
- Confirm that the
Activate the DNS serviceandActivate the mail servicecheck boxes are selected. - Under
Hosting Settings, Plesk automatically completes theDocument rootandPreferred domainoptions. Confirm that they are set to the values you want.
📘 Note
- The document root is the directory where the website files are actually stored.
- The preferred domain option enables you to redirect a website. This is frequently used for SEO (Search Engine Optimization) purposes.
- Click
OK. Plesk adds the domain.
Adding a new subdomain
To watch a video that demonstrates the following procedure, please click below: After you create a domain, you can easily add a new subdomain (for example,testing.example.com ). To do this, follow these steps:-
Log in to Plesk.
📘 Note If you do not know how to log in to your Plesk account, please see
this article . -
In the left sidebar, click
Websites & Domains:
-
Click
Add Subdomain. -
In the
Subdomain nametext box, type the subdomain name you want to use. -
In the
Parent domainlist box, select the parent domain. -
Under
Hosting Settings, Plesk automatically completes theDocument rootoption. Confirm that it is set to the value you want.📘 Note The document root is the directory where the website files are actually stored.
-
Click
OK. Plesk adds the subdomain.
Adding a new domain alias
Domain aliases enable you to point one or more domains to your primary domain. For example, if your primary domain isexample.com , you could have domain aliases forexample.org andexample.net that point toexample.com . To watch a video that demonstrates the following procedure, please click below: To add a new domain alias, follow these steps:-
Log in to Plesk.
📘 Note If you do not know how to log in to your Plesk account, please see
this article . -
In the left sidebar, click
Websites & Domains:
-
Click
Add Domain Alias. TheAdd a Domain Aliaspage appears. -
In the
Domain alias nametext box, type the name of the domain alias. -
In the
for the domainlist box, select the domain (the primary domain) for which you are creating the alias. -
Under
Settings, select the options you want for the domain alias:
-
To synchronize DNS between the primary domain and the domain alias, select the
Synchronize DNS zone with the primary domaincheck box.📘 Note When this option is enabled, any changes you make to the DNS zone of the primary domain are also applied to the DNS zone of the domain alias.
-
To enable e-mail for the domain alias, select the
Mail servicecheck box. -
To enable web content for the domain alias, select the
Web servicecheck box. -
To redirect the domain alias using the HTTP 301 (Moved Permanently) status code, select the
Redirect with the HTTP 301 codecheck box.📘 Note When this option is enabled, search engines only index the primary domain. If this option is disabled, search engines index the domain alias
and > the primary domain, which can negatively affect search engine rankings.
- Click
OK. Plesk adds the domain alias.
Adding a new forwarding domain
Domain forwarding enables you to redirect traffic from one site to another site. This feature is useful if you want to send traffic to another site that is hosted on a different server. To watch a video that demonstrates the following procedure, please click below: To add a new forwarding domain, follow these steps:-
Log in to Plesk.
📘 Note If you do not know how to log in to your Plesk account, please see
this article . -
In the left sidebar, click
Websites & Domains:
-
Click
Add Domain. TheAdding New Domain Namepage appears. -
In the
Domain nametext box, type the domain name you want to use as a forwarder. -
In the
Hosting typelist box, selectForwarding. -
Confirm that the
Activate the DNS serviceandActivate the mail servicecheck boxes are selected. -
Under
Forwarding Settings, in theDestination addresstext box, type the domain name of the target website.📘 Note For example, if you type
example.com> in step 4, and then type
example.org> in this step,
example.com> will forward to
example.org. -
In the
Forwarding typesection, select the forwarding method you want to use:
Moved permanently (code 301)Moved temporarily (code 302)Frame forwarding
- Click
OK. Plesk adds the forwarding domain.